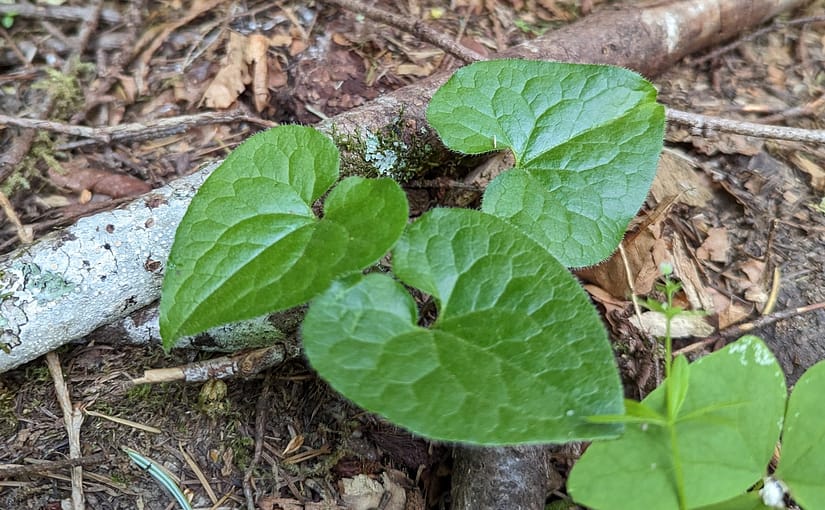
spice up your campsite cooking with wild ginger

today’s wild edible profile is one of my favorites, we’ll be taking a look at wild ginger (specifically, western wild ginger).

this one took me a while to find for the first time since it’s got a number of common lookalikes, and it grows low to the ground so it’s often hidden by other larger plants, but once you find it you’ll start spotting it everywhere! the entire plant is edible, although the leaves and flowers can be quite bitter, so we’re really only interested in its long, trailing roots. let’s take a look at the basic info.

wild edible profile: western wild ginger

western wild ginger (asarum caudatum)
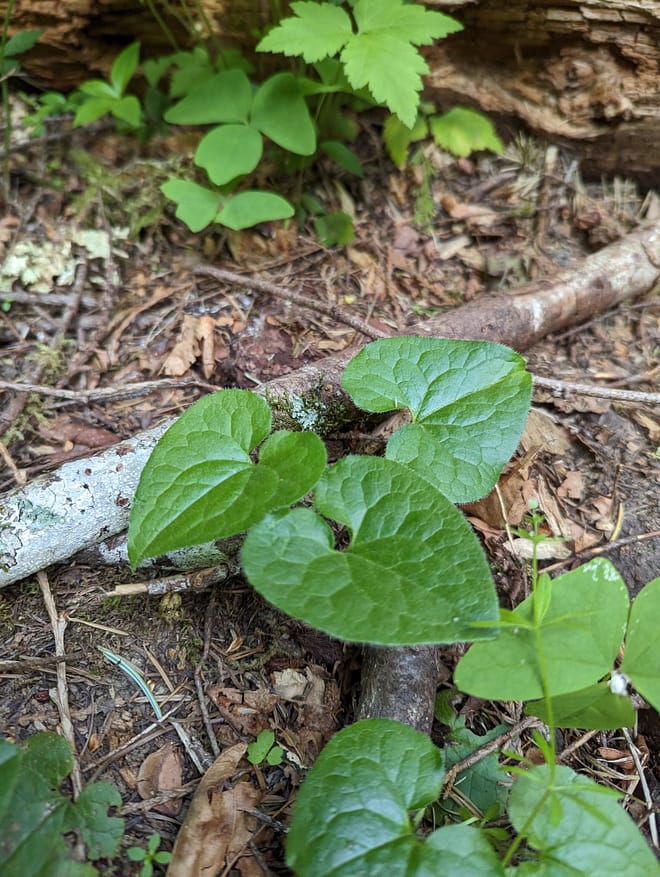
habitat:

typically found in moist conifer forests of the pacific northwest. I found these specimens in an old-growth forest on the Olympic Peninsula.

edible parts:

entire plant, but only the roots are tasty

wild ginger makes a beautiful groundcover with its heart-shaped leaves and growth habit of spreading wide – so in addition to being delicious, it’s a great choice to add to a no-grass lawn as well (I’ve just put some in my own yard this year!).
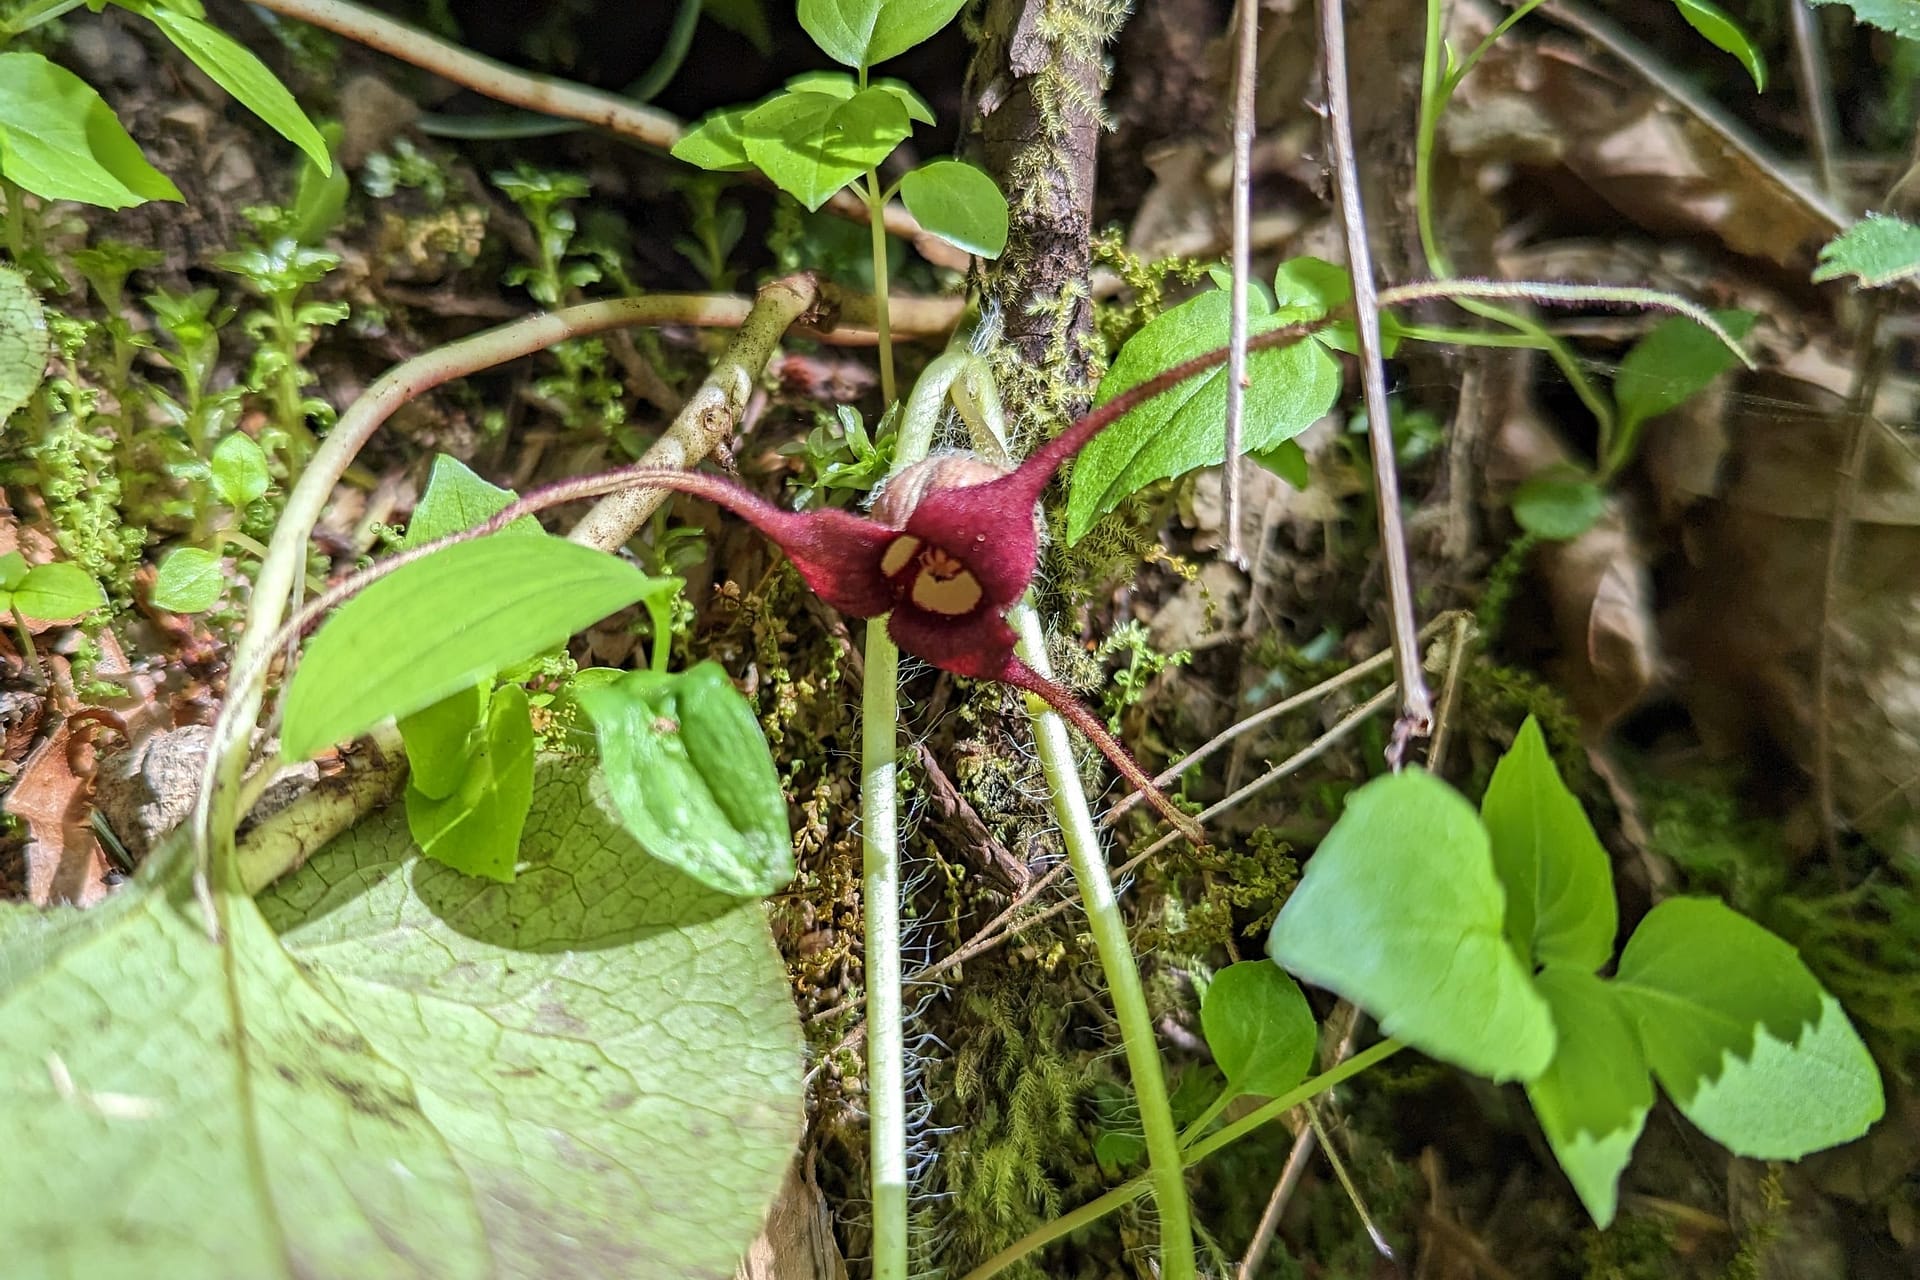
if you’re lucky, you might see it in bloom – the flowers are unusual looking with long, skinny tapered tips on each of the three petals. they can be hard to spot since they usually grow underneath the leaves, so you’ll have to search low to the ground to find one. they grow this way because one of the ways wild ginger reproduces is by attracting certain types of ants to crawl up inside the flower and carry the seeds away towards their nests.

but the main way wild ginger reproduces is by spreading its long, trailing rhizomes (underground roots) and sprouting new plants as it grows. this is good news for us, since that’s the part we want to eat! ๐Ÿ™‚ the rhizomes of wild ginger grow very shallowly, sometimes barely covered by any dirt at all, so it’s very easy to harvest. before you go pulling up plants with heart-shaped leaves though, let’s take a look at some similar-looking plants you might mistake it for.

how to forage for wild ginger

wild ginger has two main lookalikes you’ll often see growing in the same habitats. the first and most common one that you’ll see a lot of is false lily of the valley.

just like wild ginger, these have heart-shaped leaves and grow low to the ground in clusters. they’re a beautiful groundcover as well, and while they can be eaten, they don’t really taste like much. you’ll also want to be careful not to confuse it with true lily of the valley, which is very toxic to people and pets alike. luckily, true lily of the valley rarely grows in the same habitat as the false variety (and likewise, rarely with wild ginger).

the easiest way to tell apart wild ginger from either lily of the valley is simply to look at the leaves. false lily of the valley has shiny, glossy leaves with perfectly straight lines running from stem to tip. compare this to wild ginger’s matte, leathery-textured leaves with their branching, fractal-like grooves, and you shouldn’t have trouble telling the difference!

another key difference that you’ll easily notice in spring and summer is the presence of small white flower clusters poking up from the leaves. as mentioned earlier, wild ginger’s blooms are purple, three-petaled, and grow low to the ground underneath the leaves, so if you see white flowers, you’ll know you’re looking at a false lily of the valley.

another possible lookalike to wild ginger is bunchberry, also called creeping dogwood. like false lily of the valley, the leaves are brighter green and somewhat shiny, but there’s a number of immediate giveaways that we’re looking at a different plant. first, you’ll notice that bunchberry leaves always grow in symmetrical patterns, and they’re missing the telltale heart-like notch at the base of the leaf.

and of course, there’s the flower in the center of each bunch! these pretty little flowers bloom in spring and develop into a clump of red berries later in the summer. they’re totally edible and delicious, so if you see some, don’t skip out on them – but we’ll cover those in another post later on.

finally, all of these lookalikes have one more important giveaway – none of them smell like ginger ๐Ÿ™‚ when harvesting wild ginger rhizomes, snap one in half and give it a whiff – it’ll smell crisp and spicy just like the ginger you might buy at the grocery store. once you know what to look for (and smell for), you’ll be finding wild ginger all over the place.

cooking with wild ginger

now for the best part, time to eat! I love finding wild ginger when I’m out camping because it’s a delicious and versatile ingredient to add to just about anything you might be cooking at your campsite. you can use it just like you would any other kind of ginger. chop it up finely, since the texture can be a little woody if you leave the pieces too large, and toss it in a pan to let it get crispy and aromatic before adding it to whatever else you’re cooking (we made fried rice!).

if you don’t feel like cooking, wild ginger also makes an excellent tea (either dried or fresh) and is said to help with stomach aches. or if you’re feeling fancy, the roots can be candied by cooking them in sugar water for a crunchy, spicy snack.

and that’s about all there is to it! I hope you have good luck finding wild ginger on your next hike and get a chance to try it out ๐Ÿ™‚

DIY project: jewelry display box from thrifted materials

here’s a fun little project I did this weekend after a goodwill trip. I wanted somewhere to hang my necklaces up in my bedroom, since I love wearing extra-long pendants and they are perpetually a tangled mess in my jewelry box. I had the idea of a sort of shadowbox type of thing that I could stick pins into and hang my necklaces on.

I’d had this project in the back of my mind for a while, so when I spotted this ugly-ass sign at goodwill that had a nice deep frame, I tossed it in my cart and was only mildly embarrassed to be seen purchasing it. seriously, I cannot tell you how much I dislike inspirational-quote-based home decor. so I was actually quite satisfied that I’d be able to turn it into something actually worth hanging up.

first things first, we need some kind of backing material that will be good for sticking pins into. cardboard is the simplest solution and as a bonus it’s essentially free, so I trimmed a piece of an old box to fit snugly into the frame.

then I needed to cover it with something that looks nice. I had this fabric scrap laying around that I got in one of those mismatched remnant grab bags you can get from fabric sellers sometimes. I love buying these cause you get a wide variety of fabrics that you might not have otherwise picked out, and you get to save something that would have probably been thrown out otherwise.

I laid out the cardboard on my fabric scrap and cut it about 1″ larger than the board on all sides, then wrapped it around the edges and clipped in place. in retrospect this was maybe a little bit too snug. it’s a pretty thick upholstery-type fabric, so I ended up needing to stretch it a bit tight and use a really small seam allowance. it worked out, but cutting a bit more extra would have made things easier.

I stitched around 3 of the 4 sides, just going straight through the cardboard – only broke one needle, so I was pretty happy with how well my sewing machine did on such a thick, layered object.

I wanted it to have a bit of depth to it, so I opened up the unstitched bottom edge and loosely filled it with a bit of stuffing. it came out a little on the lumpy side, so I’m thinking it would’ve been better to use a slab of batting or foam here instead. but stuffing was what I had on hand, so that’s what I used. after stuffing, I went back to the sewing machine and closed up the remaining edge.

finally, all that’s left is to put it all together. the covered board fits very snug in the frame so it actually holds quite well on its own, but as a little extra insurance I gave it a good spray with some tacky adhesive. I know I have some stronger spray adhesive laying around somewhere, but I couldn’t find it. the tacky spray turned out to be plenty strong enough though (well, it hasn’t fallen off yet at least).

and here’s the finished product! turns out, my necklaces are way too long so they don’t actually all fit within the frame (bummer) but I think it looks pretty cool anyway! and it’s definitely way better than my old solution of throwing them all into a box and hoping they wouldn’t get too tangled. so I’ll be on the lookout for a larger deep frame to make another one at some point!

that’s all for now, thanks for reading ๐Ÿ™‚

wild edible recipe: toasted couscous with nettle pesto & roasted radishes

Stinging nettles are an intimidating plant to forage for, but they’re worth the trouble, I promise! My favorite thing to do with a bag of nettles is to make them into a pesto, it makes an insanely delicious and versatile ingredient.

This recipe combines the nettle pesto with one of my other favorite (but little-known) ingredients: roasted radishes. Honestly, it’s kind of criminal how few people know how delicious and juicy radishes get when you cook them. Toss a handful of radishes with a drizzle of olive oil in the oven for a short while, and they lose a lot of their sharp bite, but gain a ton of flavor in return. Trust me on this one – after you try this dish, you’ll be roasting radishes for every meal.

How to Forage for Nettles

common nettles (urtica dioica)

also known as:

stinging nettles, burn weed, burn hazel

habitat:

originally native to europe and asia, now found worldwide

edible parts:

entire plant

hazards:

skin contact causes an unpleasant itchy/burning sensation

Choosing the right gloves

Let’s get the tough part out of the way first – how the hell do you pick these things without being in utter misery the entire time?

Gloves. Yes, it’s that easy…. almost. There’s some things you should know when picking out the right pair.

I’ve tried foraging for nettles with a few different types of gloves, and from my experience you do not want to use a standard pair of gardening gloves. These are usually made of a knit fabric, which means lots of tiny holes. They might have reinforced fingertips, but the backs of your hands are going to get stung like crazy through all those little holes in the fabric, and you won’t be happy.

Another option that I’ve found doesn’t work all that well are those sterile vinyl disposable gloves, which you might have around the house for cleaning. These work alright when you start, but they’re prone to ripping easily. And they usually stop at the wrist, leaving your forearms unprotected.

So what does work? Well, you’ll want to choose a glove that has all of the following factors:

  • Non-porous
  • Sturdy, doesn’t rip easily
  • Covers forearms

For me, I’ve found that the two options which fit the criteria best are either a pair of long rubber cleaning gloves (the kind that goes all the way up to your elbow, usually for dish washing), or some leather work gloves. You can get elbow-length work gloves like this at most hardware stores.

Identification

Nettles are kind of a plain-looking plant, so you might struggle to identify them at first among all the other leafy shrubs and bushes all around. Here’s a couple of things to look for.

Clumps of small, green, fuzzy-looking fruits. May also have clusters of white or purple flower buds.

Broad leaves with deep grooves and wide, serrated toothed edges

Tips of the leaves extend much longer than the other “teeth”

Stem is stiff and orange to reddish in color, with visible hairs

You got stung, now what?

The sting of nettles is unpleasant, but for most people, not dangerous. Allergic reactions to nettles are possible, however. So do be careful and if you think you may be at risk of a reaction, maybe avoid this plant altogether. If you are stung and feel any tightening of the chest or throat, call your emergency phone line immediately.

For most folks, a nettle sting is nothing more than an irritant. It’ll be uncomfortable and itchy, but mostly you’re stuck waiting it out. Mild stings usually only last for about 15 minutes or so before fading. Over-the-counter allergy medications containing antihistamines can help it to go away faster as well.

Even though a sting will be quite itchy, do your best not to scratch it! The “sting” comes from thousands of tiny, hollow, needle-like hairs all over the plant which contain oils that cause a skin reaction. If you scratch, you’re likely to spread the oils to a larger area. If possible, wash the sting with soap and water as soon as you can.

It goes without saying, but of course the best remedy is just not to get stung in the first place ๐Ÿ™‚

Other harvesting tips

  • Bring along a sturdy bag made of a non-porous material to store your harvest in. I like to use compostable waste bags since they’re easy to roll up and stick in a pocket of my hiking backpack (although some are a little too thin and rip easily, so you may need to double-bag it).
  • Young nettle leaves taste best, so avoid any leaves that look stiff or browned. For this reason, it’s usually best to forage for nettles in the springtime, since you’ll have way more new leaves to choose from. You can definitely find a good harvest later in the season, though – you might just need to be a little more choosy with which leaves you pick.
  • Since nettles are often undesirable plants and are fast-spreading, there are no real concerns of overharvesting this plant. So fill up your bag to your heart’s content!

Recipe

Toasted Couscous with Nettle Pesto and Roasted Radishes

Ingredients

  • For the pesto:
  • 1/2 lb (200g) fresh nettle leaves
  • 4 tbsp olive oil
  • 3 cloves garlic
  • Salt and freshly ground pepper, to taste
  • For the couscous:
  • 2 lb (800g) red radishes
  • 1 tbsp olive oil, divided
  • 2 cups dry pearl couscous
  • 2 tbsp lemon juice
  • 1/4 cup pickled banana peppers
  • 3 cloves garlic
  • Shaved parmesan, to garnish

Directions

  1. Preheat the oven to 400F (200C).
  2. De-sting the nettles: Bring a large pot of water to a boil and add the nettles (don’t touch them with your bare hands!). Stir until wilted and fully submerged. Cover and cook for 3-4 minutes, then remove from the pot and drain. The nettles are now safe to touch. Rinse them briefly in cold water to cool them off, then squeeze them to wring out as much water as you can.
  3. Make the pesto: Roughly chop the cooked nettles along with 3 gloves of garlic, and add to a food processor. Pulse until finely chopped, then add the 4 tbsp of olive oil along with a good pinch of salt and some freshly ground pepper. Continue processing until well incorporated and no large leaves remain. Adjust seasoning to taste, and add additional olive oil if needed.
  4. Prepare the radishes: Wash the radishes and trim off the ends, then cut into quarters (or halves, if they’re very small). Toss radishes with 1/2 tbsp olive oil plus some salt and pepper, and spread out on a baking sheet. Roast in preheated oven for 20 minutes, taking them out halfway through to flip/toss for even cooking.
  5. Make the couscous: In a medium saucepan, add the remaining 1/2 tbsp of olive oil and bring to medium-high heat. Add the couscous and toss to coat in the oil. Continue toasting, stirring frequently, until the couscous is lightly browned. Add about 3 cups of water and bring to a boil. Cook until al dente (about 8 minutes).
  6. Prepare the toppings: While the couscous is cooking, thinly slice the remaining 3 cloves of garlic, and roughly chop the pickled peppers. Add just a dash of olive oil to a small pan over medium heat, and briefly saute the peppers and garlic to soften them – just a minute or two.
  7. Putting it all together: When the couscous is finished, drain any remaining water and return it to the pot. Stir in the nettle pesto and the 2 tbsp lemon juice until well coated. Taste and add more salt, pepper, or lemon juice as needed. Dish up the couscous and top with a big scoop of roasted radishes. Sprinkle the garlic and pepper mix on top along with a scant handful of shaved parmesan, and serve.

Notes

  • If you can’t find pearl couscous, a small pasta such as orzo can be a decent substitute

crochet pattern: blink dagger [dota 2]

This post was originally written in 2020 and appeared on my old blog, daizedhandmade.blogspot.com. It has been updated and migrated here instead!

[Click to jump to the pattern]

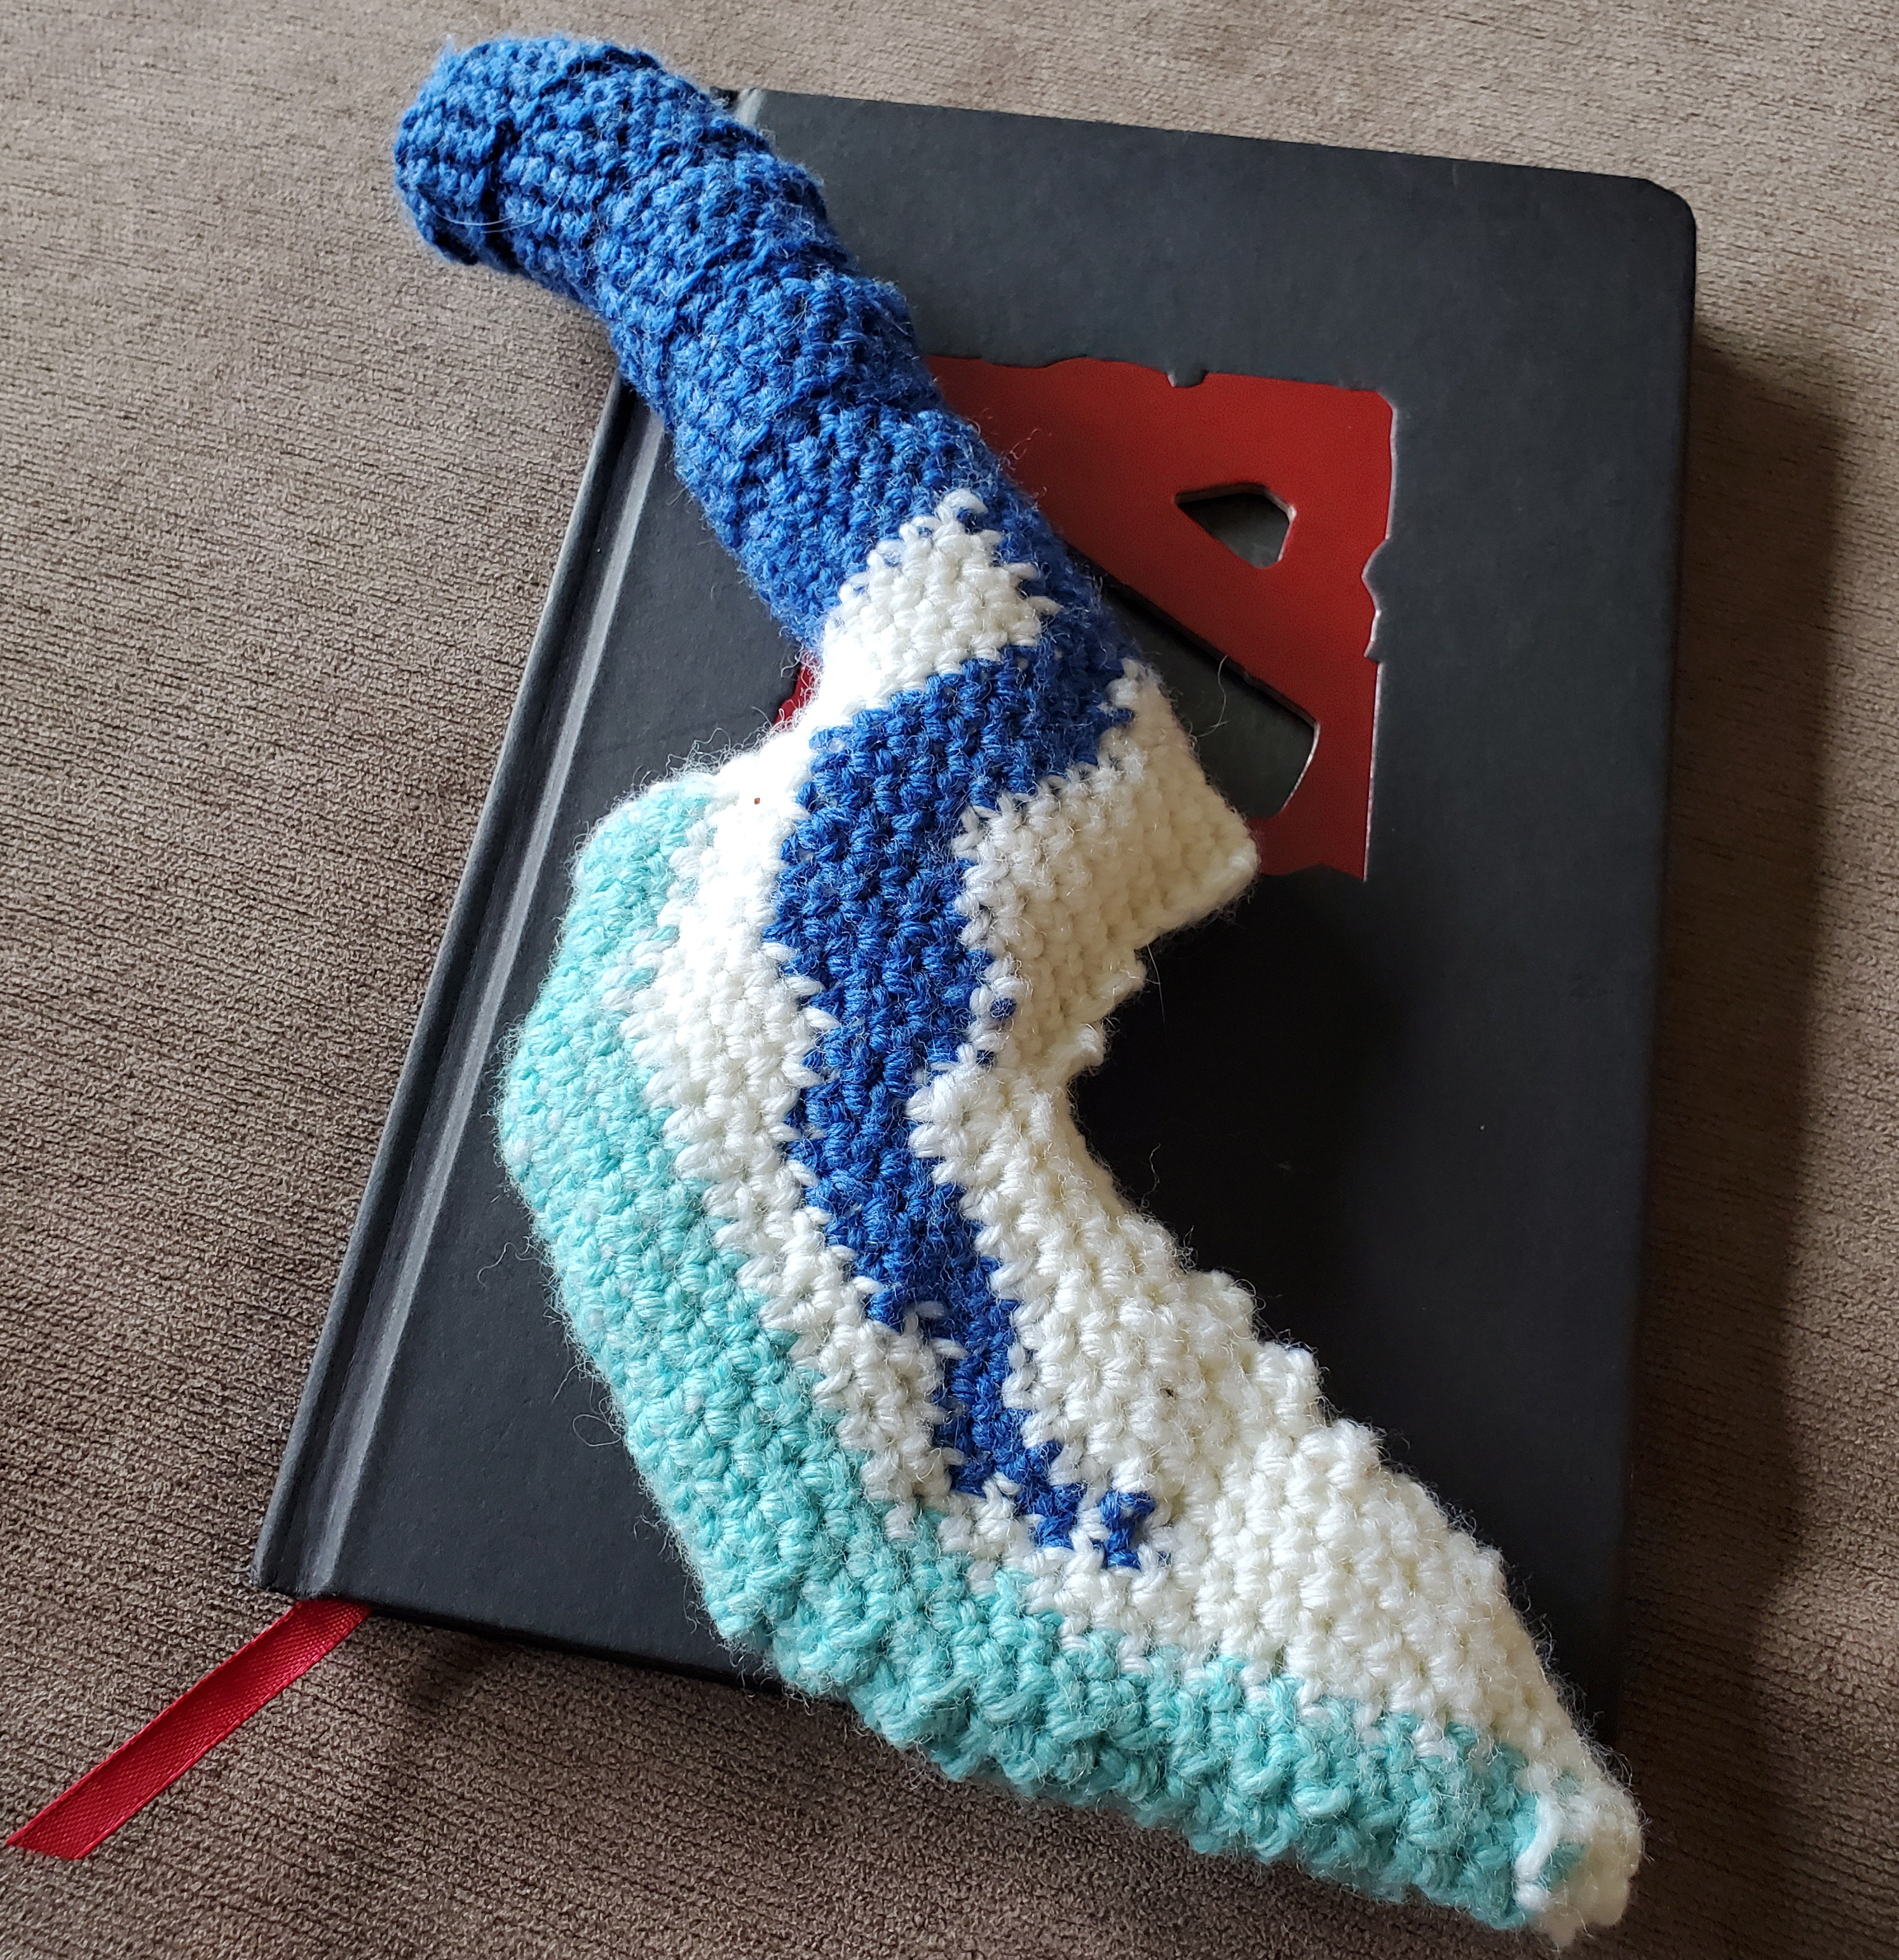
Today I’ll be sharing a crochet pattern for a plushie Blink Dagger. This is probably the most complex pattern I’ve ever designed in terms of shaping, but the stitches that it uses are very simple, so it evens out (:

My goal was to make this in one continuous piece, without any of the tediousness of stitching together many separate parts like a lot of amigurumi projects – just pure crochet. While I feel like there’s a lot of room for improvement here, I’m quite happy with the result.

Some of the shapes, in particular the place where the handle meets the blade, took me hours of attempting and unraveling to try and get it to look just right (you can see how many crossed out rows I’ve got in the photo – there’s several more pages of that).

Even though I might have bitten off a little more than I could chew with this project, I think I learned a lot! So, let’s get on to the pattern itself:


Dota 2 Blink Dagger Crochet Pattern

Note: This is an intermediate level pattern. You should be familiar with basic amigurumi techniques and comfortable with color switching.

What you’ll need:

  • Medium weight yarn in three colors: Blue, White, and Light Blue (I used Cascade Superwash 220, gauge 5 – 5.5 single crochet per inch)
  • 4.5mm crochet hook
  • Polyfill stuffing
  • Tapestry needle for weaving in ends
  • Stitch markers

Stitches & Abbreviations:

As with most amigurumi, this pattern is worked mainly in single crochet. Here’s the abbreviations and notation I’ll be using:

MR – Magic ring
Slst – Slip stitch
Ch – Chain stitch
Sc – Single crochet
Inc – Single crochet increase
Dec – Single crochet decrease
FLO Sc – Front loop only single crochet
BLO Sc – Back loop only single crochet
[ …. ] – Indicates a group to be repeated (eg. [ Sc, Inc ] x2 means Sc, Inc , Sc, Inc)

Curly braces before a stitch indicate a color change (lasts until a new color is specified):

{W} Stitch in white
{B} Stitch in blue
{LB} Stitch in light blue

Notes:

To keep color changes looking clean, always switch yarn on the last yarn-over of the previous stitch. For example, to switch on a single crochet, you’ll insert your hook, draw up a loop of color A, then swap to color B to yarn over and pull through.

Whether or not to carry yarn along after switching colors: You can either carry along the other colors if you don’t mind a bit showing through, or leave them loose on the inside of the project since it won’t be visible anyway. Just make sure not to pull the strands too tight or you’ll find it impossible to get any stuffing in there later.

If the shape isn’t looking right: Since we’re working in a continuous spiral, this pattern can end up slightly twisted to one side as you work. I recommend using a bit of needle sculpting to get it back in line.

Pattern:

Row 1 (6 stitches): Start with dark blue yarn and make a magic loop. In the loop, make 6 single crochet. Join with a slip stitch.

Row 2 (12st): Inc x6, join with Slst

Row 3 (18st): [Sc, Inc] x6, join with Slst

Row 4 (18st): Sc x18 in front loop only. This will give some definition to the edge, like so:

Do not join this row – from now we’ll start working in one continuous spiral.

Row 5 (18st): Sc x3, Dec x2, Sc x6, Inc x2, Sc x3
By increasing on one side and decreasing the other, the tube we’re making will start to angle towards one side. This’ll help create the crooked shape of the handle.

Row 6 (18st): Sc x18

Row 7 (18st): Sc x4, Dec, Sc x7, Inc, Sc x4

Row 8 (18st): FLO Sc x18

Row 9 (18st): BLO Sc x18

Alternating between front loop and back loop only here will create a ridge that works to separate the handle into multiple segments. This will be repeated a few times later.

Rows 10 – 12 (18st): Sc x18

Row 13 (18st): FLO Sc x18

Row 14 (18st): BLO Sc x18

Row 15 (18st): Sc x3, Inc x2, Sc x6, Dec x2, Sc x3

Rows 16 – 17 (18st): Sc x18

Rows 18-20 (18st): Repeat rows 13 through 15

Rows 21 – 22 (18st): Sc x18

Row 23 (18st): FLO Sc x18

Row 24 (18st): BLO Sc x18

Rows 25 – 27 (18st): Sc x18
This is the last section of the handle. Things will get more tricky from here on. We’ll be introducing two new colors, so get out your white and light blue yarn and let’s continue.

From here on I’ll be using {W}, {B}, and {LB} to indicate white, blue, and light blue yarn respectively.

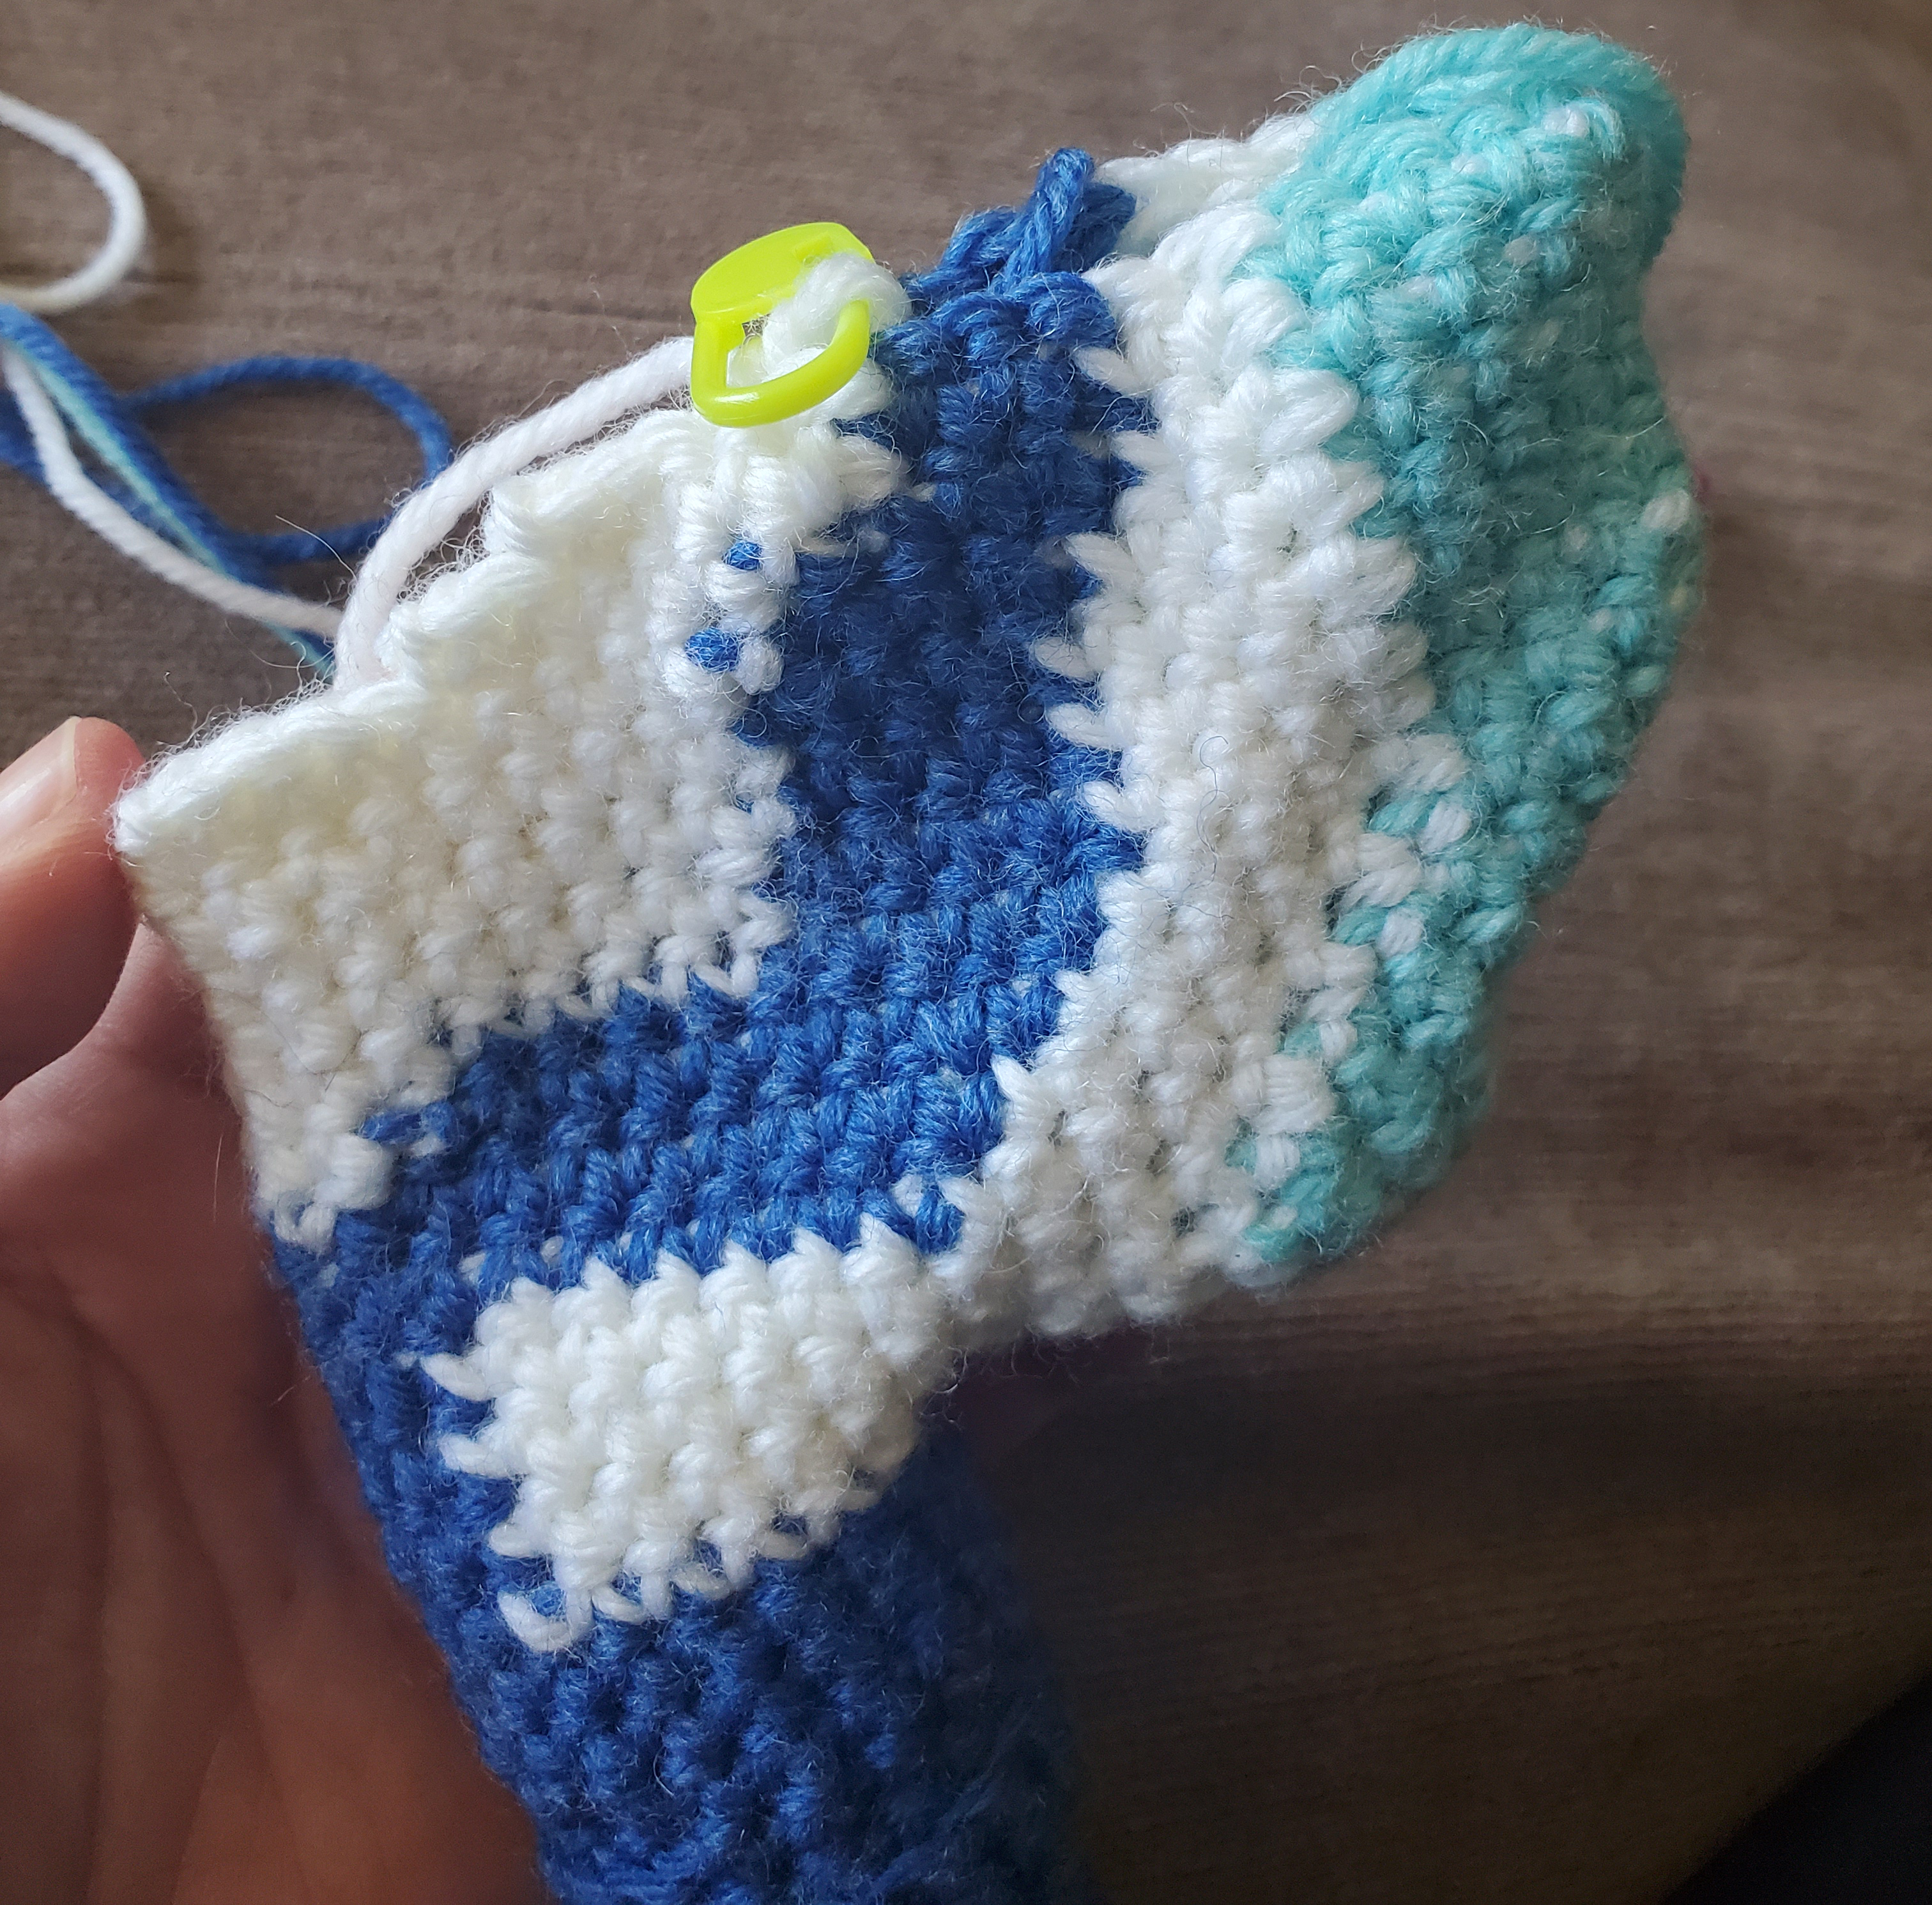
Row 28 (32st): {W} Sc x6, Ch 8, then turn and Sc x7 back down the front loops of the chain. Sc x6 on the handle base, leaving 1 loop empty when you rejoin (the loop next to where you started to chain). Finish the row with {B} Sc x5.

You should end up with a stringy bit of white sticking off your handle that you’ll start to build the blade off of. Here’s a picture description to help explain:

Row 29 (32st): {W} Sc x10, {LB} Sc x7, {W} Sc x10, {B} Sc x5

Row 30 (33st): {W} Sc x10, {LB} Sc x3, Inc, Sc x3, {W} Sc x10, {B} Sc x5

Row 31 (35st): {W} Sc x11, {LB} Sc x2, Inc x2, Sc x2, {W} Sc x4, {B} Sc x12

Row 32 (37st): {B} Sc x7, {W} Sc x5, {LB} Sc x2, Inc x2, Sc x2, {W} Sc x4, {B} Sc x9, {W} Sc x3, {B} Sc x1

Row 33 (39st): {B} Sc x8, {W} Sc x5, {LB} Sc x2, Inc x2, Sc x2, {W} Sc x4, {B} Sc x9, {W} Sc x5

Row 34 (41st): {B} Sc x9, {W} Sc x5, {LB} Sc x2, Inc x2, Sc x2, {W} Sc x4, {B} Sc x5, {W} Sc x10

Row 35 (41st): {W} Sc x5, {B} Sc x5, {W} Sc x4, {LB} Sc x8, {W} Sc x4, {B} Sc x5, {W} Sc x10

Row 36 (41st): {W} Sc x5, {B} Sc x5, {W} Sc x4, {LB} Sc x8, {W} Sc x4, {B} Sc x4, {W} Sc x11

Row 37 (41st): {W} Sc x6, {B} Sc x4, {W} Sc x4, {LB} Sc x8, {W} Sc x4, {B} Sc x4, {W} Sc x11
 
We’re about to start really shaping the blade now, so this is a good time to stuff your handle. I didn’t stuff mine overly full, since I didn’t want it to stretch out so much that you wouldn’t be able to see the shape detailing anymore, but if you want yours to be more sturdy and less floppy you can add extra stuffing to give it more structure.

Row 38 (41st): {W} Sc x6, {B} Sc x4, {W} Sc x4, {LB} Sc x8, {W} Sc x3, {B} Sc x4, {W} Sc x10, turn and Sc across both the current loop and the one on the opposite row to close it up, 2 times. Here’s what that will look like:

Row 39 (35st): {W} Sc across x2, Sc x5, {B} Sc x4, {W} Sc x3, {LB} Sc x8, {W} Sc x2, {B} Sc x3, {W} Sc x7, Ch

Row 40 (31st): {W} Sc across x2, Sc x5, {B} Sc x3, {W} Sc x2, {LB} Sc x8, {W} Sc x2, {B} Sc x3, {W} Sc x5, Ch

Row 41 (26st): {W} Sc across x2, Sc x3, {B} Sc x3, {W} Sc x2, {LB} Sc x8, {W} Sc x3, {B} Sc x3, {W} Sc x2
We’ve now closed up about half the blade, giving it a jagged chunked-out look:

Row 42 (25st): {W} Sc x4, {B} Sc x3, {W} Sc x2, {LB} Sc x8, {W} Sc x2, {B} Sc x3, {W} Sc x3

Row 43 (25st): {W} Sc x4, {B} Sc x3, {W} Sc x2, {LB} Sc x8, {W} Sc x2, {B} Sc x3, {W} Sc x3

Row 44 (27st): {W} Sc x4, {B} Sc x3, {W} Sc x2, {LB} Sc x8, {W} Sc x3, {B} Sc x2, {W} Sc x3, Ch x2, turn

The chain stitches at the end will be the basis of a chunked increase that will raise the top of the blade gradually back up in line with the handle.

Row 45 (26st): {W} Sc in chain, skip a loop then Sc x3, {B} Sc x2, {W} Sc x3, {LB} Sc x8, {W} Sc x3, {B} Sc x2, {W} Sc x4
The empty loop here will be next to where you started the chain on the previous row (similar to what we did back on row 28 when creating the base of the blade)

Row 46 (29st): {W} Sc x5, {B} Sc x2, {W} Sc x3, {LB} Sc x8, {W} Sc x2, {B} Sc x2, {W} Sc x5, Ch x2

Row 47 (28st): {W} Sc in chain, skip a loop then Sc x5, {B} Sc x2, {W} Sc x2, {LB} Sc x8, {W} Sc x2, {B} Sc x2, {W} Sc x6

Row 48 (28st): {W} Sc x6, {B} Sc x2, {W} Sc x2, {LB} Sc x2, Dec x2, Sc x3, {W} Sc x2, {B} Sc, {W} Sc x6, Ch x2

Row 49 (27st): {W} Sc in chain, skip a loop then Sc x5, {B} Sc, {W} Sc x2, {LB} Sc x8, {W} Sc x2, {B} Sc, {W} Sc x7

Row 50 (27st): {W} Sc x6, {B} Sc, {W} Sc x2, {LB} Sc x2, Dec x2, Sc x3, {W} Sc x2, {B} Sc, {W} Sc x6, Ch x2

Row 51 (25st): {W} Sc in chain, skip a loop then Sc x4, {B} Sc, {W} Sc x2, {LB} Sc x8, {W} Sc x2, {B} Sc, {W} Sc x6
After this row, we’re finished with the dark blue. Cut the yarn and weave in the loose end. This is also a good time to loosely stuff the blade to give it a little structure and shape. Be careful not to overstuff, since you want it to lay fairly flat and not make it too round or cylindrical.

Row 52 (24st): {W} Sc x8, {LB} Sc x2, Dec x2, Sc x3, {W} Sc x7, Ch x2

Row 53 (22st): {W} Sc in chain, skip a loop then Sc x7, {LB} Sc x2, Dec x2, Sc x3, {W} Sc x7

Row 54 (22st): {W} Sc x7, {LB} Sc x2, Dec x2, Sc x3, {W} Sc x6, Ch x2

Row 55 (19st): {W} Sc in chain, skip a loop then Sc x5, {LB} Sc x2, Dec x2, Sc x3, {W} Sc x6

Row 56 (18st): {W} Sc x6, {LB} Sc x2, Dec x2, Sc x3, {W} Sc x5

Row 57 (16st): {W} Sc x5, {LB} Sc x2, Dec x2, Sc x3, {W} Sc x4

Row 58 (14st): {W} Sc x4, {LB} Sc x2, Dec x2, Sc x3, {W} Sc x3

Row 59 (12st): {W} Sc x3, {LB} Sc x2, Dec x2, Sc x3, {W} Sc x2
Stuff the remainder of the blade after this row, it’ll soon be too small to get any stuffing in.

Row 60 (10st): {W} Sc x2, {LB} Sc x2, Dec x2, Sc x2, {W} Sc x2

Row 61 (8st): {W} Sc x2, {LB} Sc, Dec x2, Sc, {W} Sc x2

Row 62 (6st): {W} Sc x2, {LB} Sc, Dec {W} Sc x2
Last chance to put a little bit more stuffing in the tip! You can also cut the light blue yarn and weave in the end here, since we won’t be using it anymore.

Row 63 (3st): {W} Dec x3

Row 64 (1st): {W} Dec across the remaining 3 loops to close up. Finish off and weave in the end of the yarn. At this point you can clean up the shape a little bit with some needle sculpting if needed. And it’s done!

Hope you enjoyed the pattern, if you make this please let me know and show me some pictures! If you have any questions or if anything is unclear just leave a comment.

And it’d be super neat if you check out my Etsy shop at DaizedHandmade for more patterns and stuff I made (:

tutorial: how to use a nostepinne to wind perfect yarn balls

Click to skip to tutorial


Honestly, is there anything more satisfying than pulling from a perfect center-pull yarn ball? Well, ok, there probably is, but this is definitely one of my favorite simple pleasures. Crochet for me is mostly about the chill satisfying vibes and the enjoyment of seeing something created from nothing, stitch by stitch and row by row. Finishing projects isn’t really my specialty anyway, yknow? So I’m all about enjoying the journey.

Even though I own an automatic yarn winder, one of the things I really enjoy is hand-winding my yarn balls. It’s one of those simple, satisfying tasks that I can just zone out to. And I need to do it pretty often, because I have a lot of tangled clumps of yarn.

See, I used to have a bad yarn-buying habit. I think most crafters can relate1and if you don’t, TELL US YOUR SECRETS, HOW DO YOU DO IT??. There’s so many gorgeous yarns out there, and whenever I find myself in a craft store, it is so hard not to just walk out with a huge bag full of yarn. Even though I have zero concrete plans for what I’d do with it, I just want it because it’s beautiful and gets me all dreamy about all the things I could make.

But it’s a bad habit for a lot of reasons. What you end up with is a bunch of random yarn, but never the right yarn for the project you want to do. So whenever you start making something, you inevitably have to go get new yarn anyway, and all the stuff you bought “just because” continues to sit there in your disorganized mountain of yarn forever and never gets used.

YARN HOARDER DETECTED

Recently I made it a goal to change this. I’m working on being more sustainable and reducing my consumption, and craft supplies were a big part of what I was buying. I just kept acquiring more and more and more, and honestly part of me doesn’t want to stop, cause my stash makes me really happy and I do like having a good amount yarn on hand for spontaneous projects.

So I made a compromise – I can acquire as much new yarn as I want, as long as it’s secondhand or salvaged. Sometimes I do let myself buy a little bit of new yarn if I really need something specific to finish a project, but I’ve been trying to use what I have as much as possible. It turns out to be a pretty fun creative challenge actually, being constrained by only being able to use what you already have.


Ok, back to yarn-winding. I swear, I’m getting to the point eventually. So, what happened when I started getting a lot of yarn secondhand is that most of it comes a knotted, unusable clump. As a result, I like to think I’ve gotten pretty good at untangling and rewinding it into nice, tidy little yarn balls.

A while back I’d bought a Nostepinne, which is this old-school traditional yarn winding device that’s basically just a smooth, tapered wooden stick. It’s kinda funny actually, a lot of internet reviews you’ll find are from people who bought them to use as a wand for their kid’s wizard halloween costume.

It’s the perfect tool for hand-winding though. I keep it in my crochet bag so if I’m working on a project and my yarn ball starts to collapse and fall apart, I can just quickly re-wind it back into shape. It also takes up wayyyy less space than one of those automatic yarn winders, and doesn’t take any setup, which is a huge benefit if you’re living in a small apartment and don’t have the luxury of a dedicated crafting space.

In a pinch, you also can use any other roughly stick-shaped object to hand-wind your yarn – I’ve done it on a spare crochet hook, on a sharpie marker, and even on my own finger – but I have to say it’s definitely best to use an actual Nostepinne if you have one. I will admit I’m not 100% sure if my method for using it is the “correct” way, but it works for me every time, so here we go!


tutorial: how to wind yarn using a nostepinne

1. prepare materials

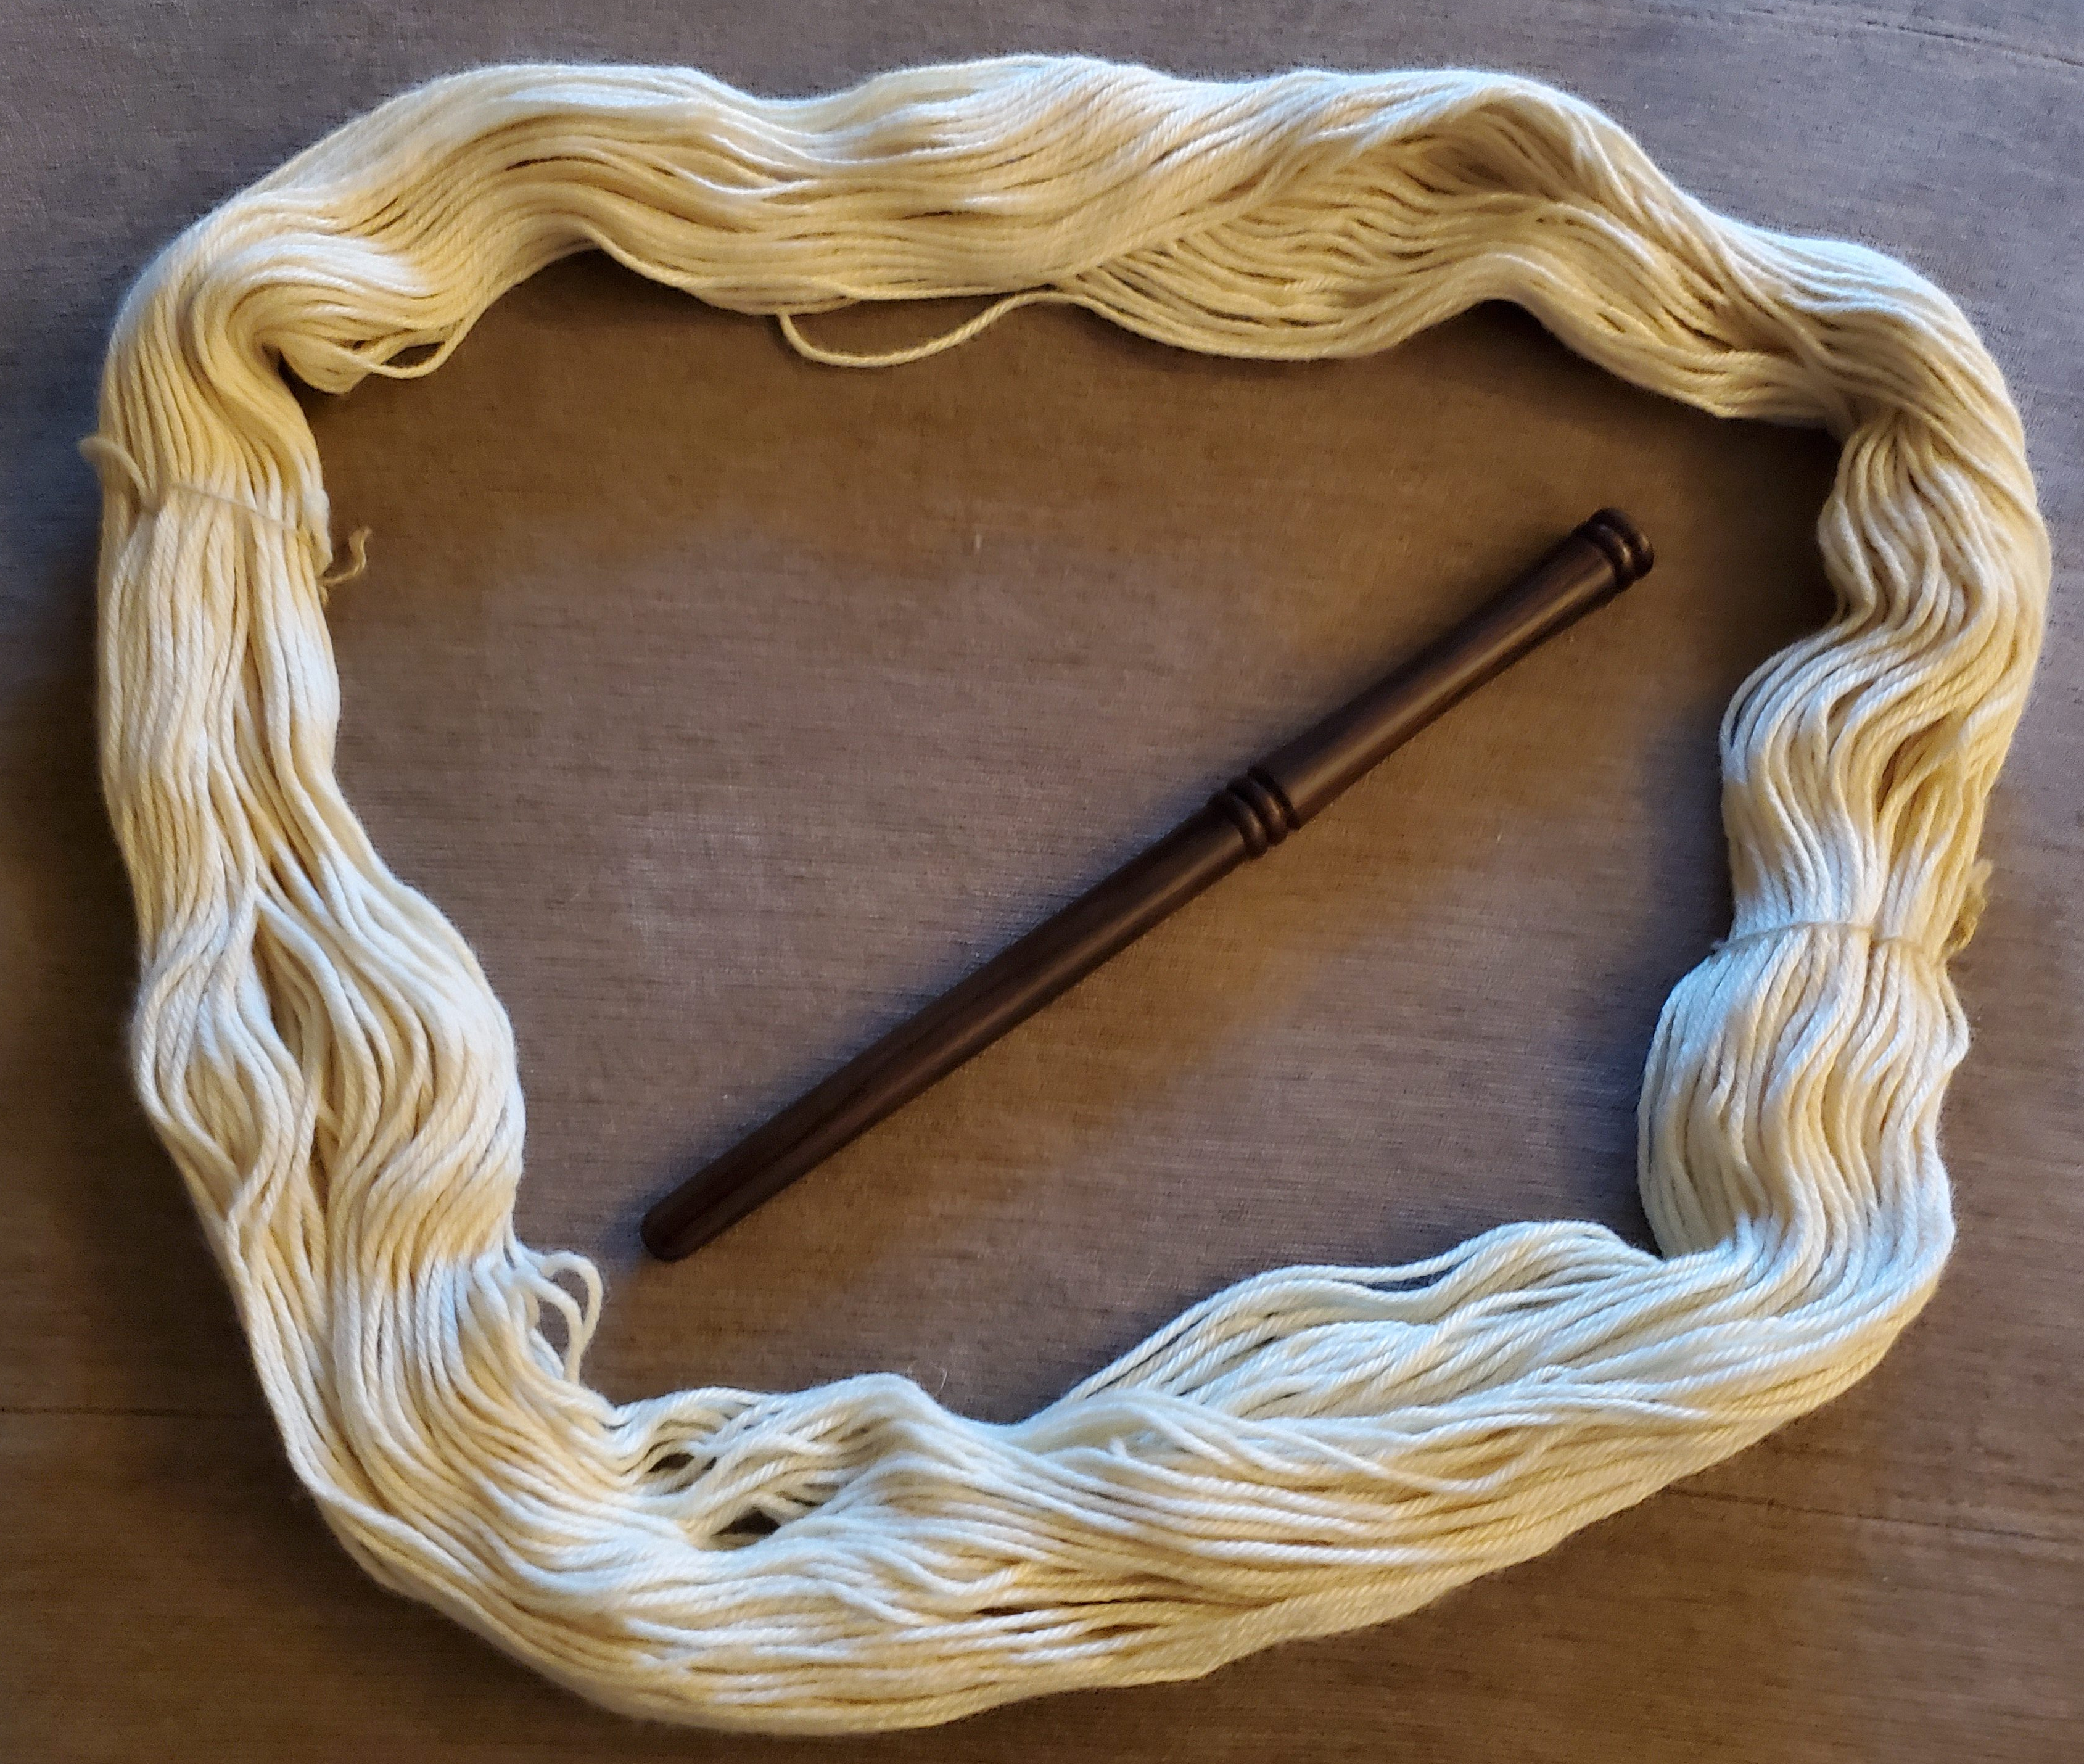
In this tutorial, I’ll be working from some yarn that came in a hank (the figure-8 kind of yarn ball). A lot of yarn is sold in hanks, but they’re hard to work from directly and will inevitably end up in a tangled wad if you don’t re-wind them, so it’s a good time to try out your nostepinne.

To get started from a hank, carefully untwist it and lay it flat in a circle shape like shown in the picture. Note: it is extremely important to maintain the integrity of the circle while you work (harder than it sounds!). It helps to have a clear space in front of you where you can lay out the yarn so it doesn’t get messed up.

If you’re starting from completely unwound yarn, just do your best to untangle it and lay it out in a loose circle similar to the hank. You might need to stop and deal with some knots along the way, but it won’t really change the process.

2. attach yarn

Near the handle part of the nostepinne, you’ll see a couple of grooves. These are for holding your loose yarn end which will eventually become the center strand that you’ll pull from. Wrap the end around one of the grooves, leaving a short tail that you can grasp onto, and tie a loose knot.

3. lay down the base

We’ll start by wrapping a couple base layers of yarn. This forms the center of your yarn ball and helps the outer layers to have something to grip onto.

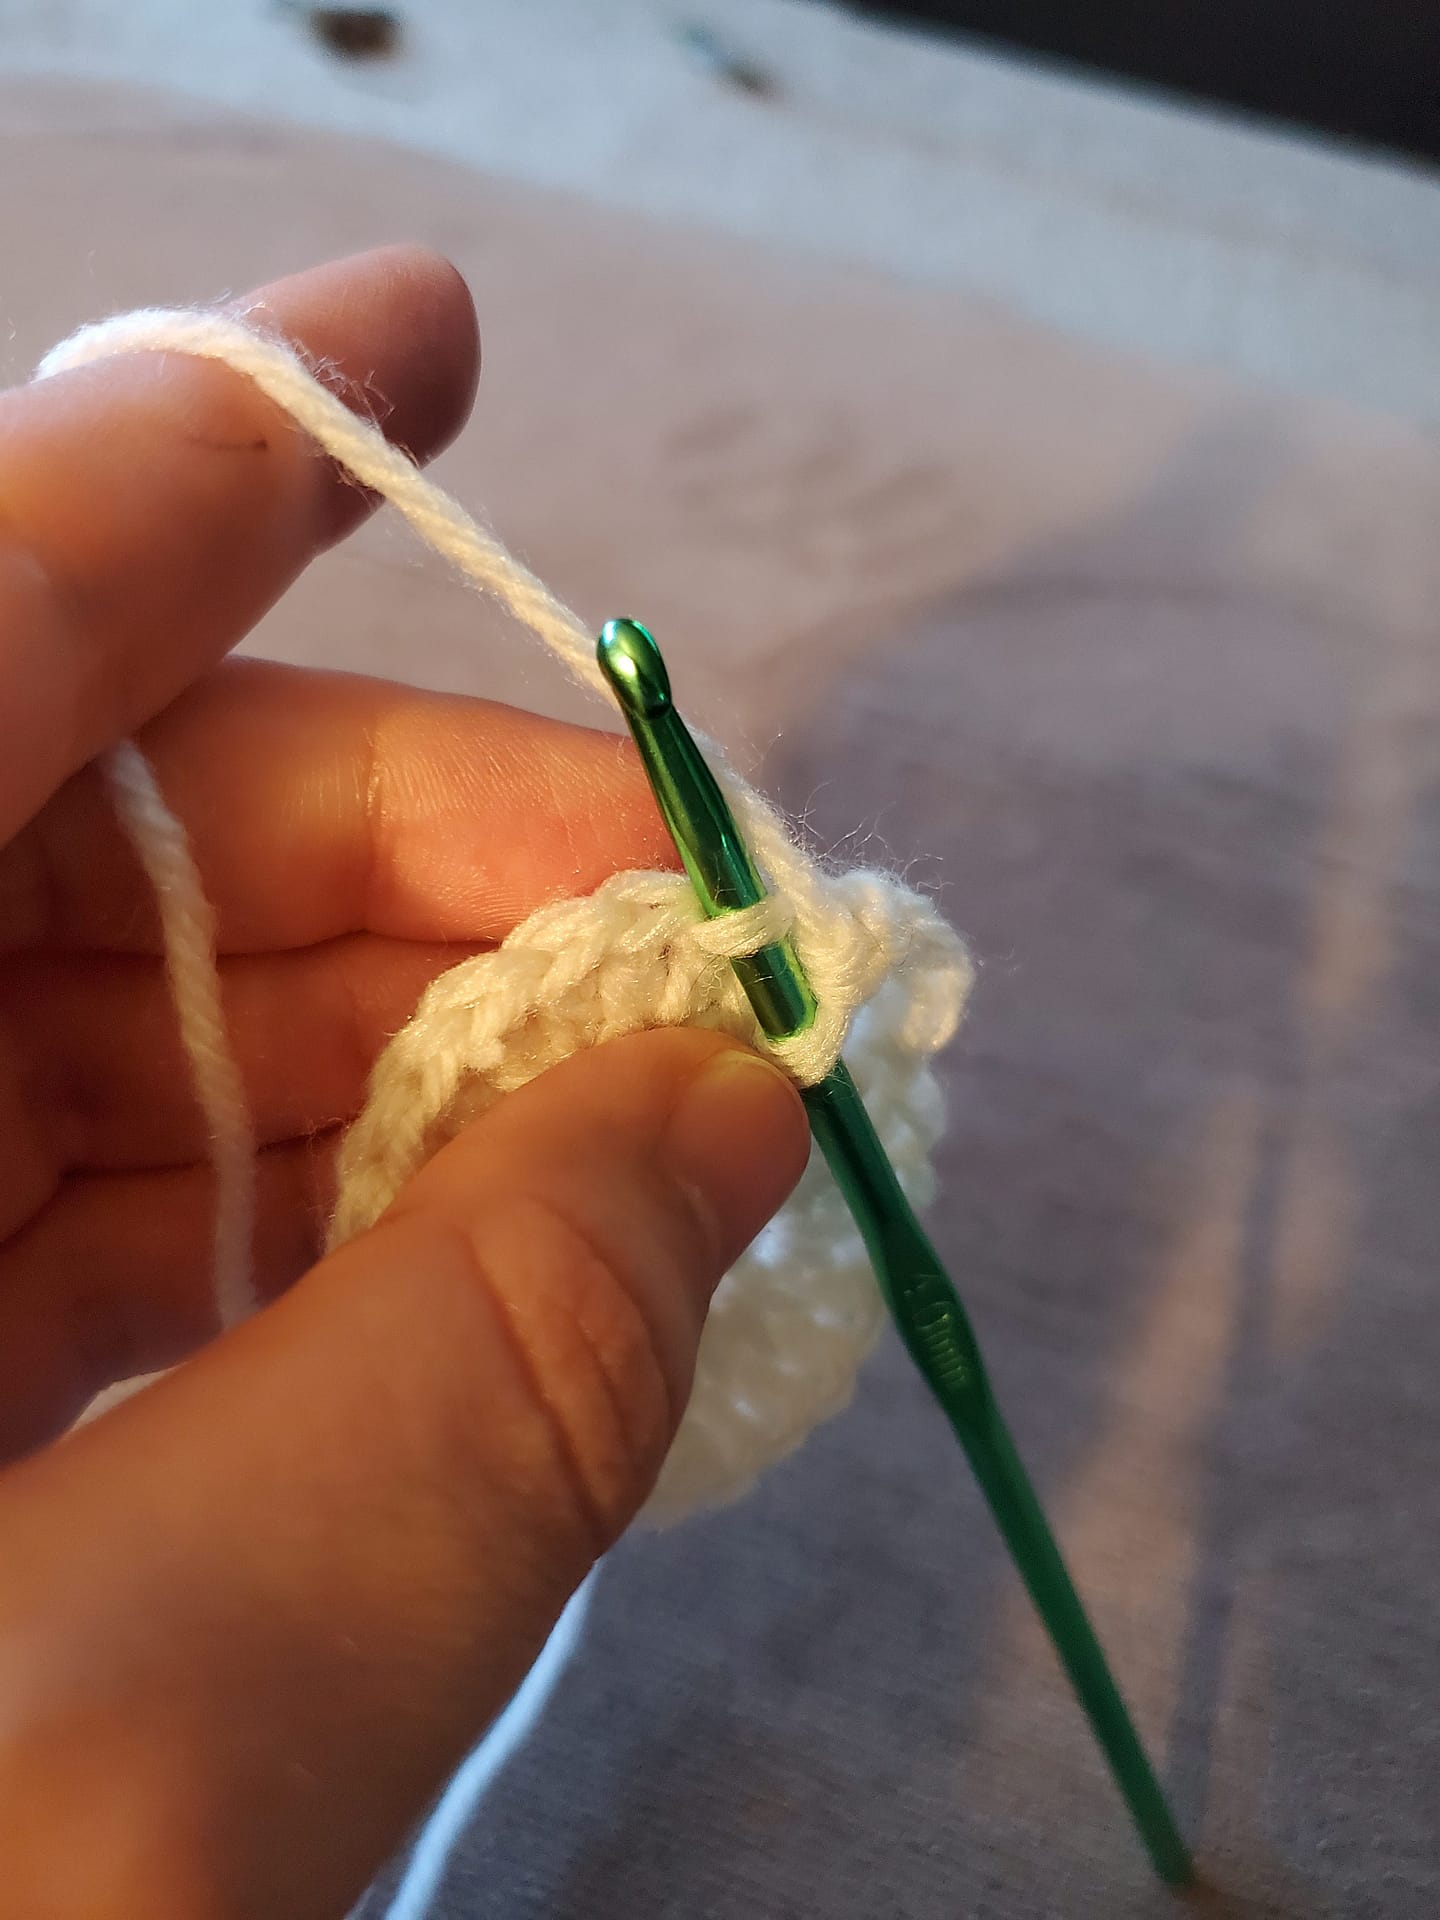
Take the nostepinne in your non-dominant hand (left hand for right-handers; right hand for left-handers) and use your other hand to wrap a single layer of yarn, moving from the base of the stick towards the end. The base layer doesn’t need to go the full length of the nostepinne, but give yourself a few inches to work with.

Now, reverse direction (moving from the end of the stick towards your hand) and lay down another flat layer on top of the first one. Repeat a couple more times to add structure to your base so it all holds together.

4. wind, wind, wind

Ok, that’s all the setup! From now on it’s just winding until you run out of yarn. Once you get into the rhythm of it, it’s really simple. Here’s the process.

Starting roughly in the center of your base, begin wrapping your yarn at an upward angle. While you wrap, gradually turn the wand towards you, to keep moving your yarn so that it lays flat next to the last loop.

That may be a bit hard to understand just from text, so here’s some diagrams to help:

At first it’s gonna look pretty messy, but keep at it for a bit and you’ll start to see it take shape into a square-ish ball with rounded corners. Eventually your yarn ball will grow to the point where you can’t see the base layer anymore.

5. finishing off

Once you run out of yarn, you should end up with something like this:

To finish it off, tuck the loose end into the outer layer, untie your starting yarn, and slide the whole ball off the stick.

โœจ finished! โœจ

and there you have it! Ain’t that a thing of beauty.

It might take a few tries to get the hang of it, but once you do, it’s pretty relaxing. I can whip up one of these balls in under 10 minutes if my yarn is cooperating and doesn’t decide to tangle up.

I hope this was a useful guide for y’all, and I’d love to hear from you in the comments if you know of any other useful tricks or have questions about the tutorial ๐Ÿ™‚ thanks for reading!

footnotes

  • 1
    and if you don’t, TELL US YOUR SECRETS, HOW DO YOU DO IT??

ramen noodle bowl amigurumi (free crochet pattern)

Click to skip to pattern

This is one of the first patterns I self-drafted. I’d been learning a lot of amigurumi techniques and wanted to try designing something myself. I had a bundle of cheap mini yarn balls that I’d gotten when I was just learning how to crochet that I’d barely used, since it’s a pretty low quality yarn and in such small amounts that it wasn’t really enough for most projects. So I sat there staring at them for a while and tried to challenge myself to make something with lots of small parts of different colors to use up as much of the yarn as possible.

I really enjoy these kinds of projects. It feels good to use something up that you already have instead of buying more things, and the constraints force you to be creative. What I came up with is this

I really enjoy these kinds of projects. It feels good to use something up that you already have instead of buying more things, and the constraints force you to be creative. What I came up with is an amigurumi bowl of ramen noodles, topped with some mini bok choy, a fish cake, and an egg (: I think the bok choy leaves are my personal favorite.

Read on for the free pattern, or head over to the Etsy listing if you would like to support me by purchasing the downloadable PDF!

Ramen Bowl Amigurumi Pattern

Notes:

  • This is a beginner / intermediate level pattern. I’ll assume that you’re familiar with basic stitches and techniques like increasing, decreasing, and working in the round.
  • For the bowl, you can definitely choose other colors than what I used here – I just picked blue & white cause it’s what I had on hand.
  • To keep color changes looking clean, always switch yarn on the last yarn-over of the previous stitch. For example, to switch from A to B on a single crochet, you’ll insert your hook, draw up a loop of color A, then swap to color B to yarn over and pull through.
  • If you prefer a downloadable PDF of this pattern, you can purchase it here

Materials needed:

  • Worsted weight yarn in several colors. I had one mini-ball (22yds) of each color to work with and ended up with some leftovers. Color list:
    • Green
    • White
    • Pink
    • Yellow
    • Beige
    • Brown
    • Light blue*
    • Dark blue*
      • * These colors are used only for the bowl and can be replaced with any color(s) of your choice
  • 4mm (size G) crochet hook
  • Small handful of stuffing
  • Tapestry needle for weaving in ends
  • Stitch markers

Stitches & Abbreviations:

As with most amigurumi, this pattern is worked mostly in single crochet, with a few exceptions. Here’s the abbreviations and notation you should know (all stitches are in US terminology):

  • Sl st – Slip stitch
  • Ch – Chain stitch
  • Sc – Single crochet
  • Hdc – Half double crochet
  • Dc – Double crochet
  • Tr – Treble crochet
  • Inc – Increase (two stitches in one loop)
    • May be combined with a stitch type, for example HdcInc would be two Hdc in one loop. If no stitch is specified (just “Inc“), use single crochet.
  • Dec – Decrease (one stitch across two loops)
    • Same as increase, assume single crochet unless a stitch type is specified.

Additional markings & formatting:

  • [ … ] – A group of stitches to be repeated
    • Example: “[ Sc, Inc ] x2” means “Sc, Inc, Sc, Inc”
  • {color} – Indicates which color to use. Lasts until a new color is specified.
  • ( ##st ) – Total number of stitches that you should have in this row
    • If the row starts with chain stitches, they are counted as one stitch

Part 1: Bowl base

The bowl has two pieces – a base, and the bowl itself. The base is worked entirely in white yarn.

Row 1 (12st): Start with white yarn and make a magic ring. Make 3 chain stitches, then Dc x11 in the loop. Join the circle with a slip stitch and pull the loop end to tighten.

Row 2 (24st): Ch 3. Dc in the same st as the chains, then Dc twice in each stitch the rest of the way around (DcInc). Join with Sl st.

Row 3 (24st): Ch 1. In each stitch for the rest of the round, Sc in the front loop only. This will create a hard 90-degree edge for the bottom of the bowl base. Finish this row with a slip stitch to join.

Row 4 (24st): To add just a little more height, we’ll do one more plain single crochet round. Ch 1, Sc in each loop to the end of the round, join with Sl st. Finish off and leave a long tail of yarn for attaching this piece to the bowl later.

Part 2: Bowl dish

You can be a bit creative here if you like – I made a simple striped bowl since I didn’t have enough of any one color to make it solid, and I was pretty happy how it turned out. But feel free to do whatever color/design you’re comfortable with.

Unlike the previous piece, this one will be worked in the round, so we won’t be slip stitching to close each row. Stitch markers are really helpful here.

Row 1 (6st): {light blue} Make a magic ring. Make 6 Sc in the loop and pull the end to close.

Row 2 (12st): Make two sc in each stitch all the way around (Single crochet increase – referred to from here on as just “Inc”).

Row 3 (18st): [ Inc, Sc ] x 6

Row 4 (24st): Sc, [ Inc, Sc x2 ] x 5, Inc, Sc

Row 5 (30st): [ Inc, Sc x3 ] x 6

Row 6 (36st): Sc x2, [ Inc, Sc x4 ] x 5, Inc, Sc x2

Row 7 (42st): [ Inc, Sc x5 ] x 6

Row 8 (48st): Sc x3, [ Inc, Sc x6 ] x 5, Inc, Sc x3

Row 9 (54st): [ Inc, Sc x7 ] x 6

Row 10 (59st): [ Inc, Sc x10 ] x 4, Inc, Sc x9

Row 11 (63st): {white} Sc x7, [ Inc, Sc x14 ] x 3, Inc, Sc x6

Row 12 (63st): {light blue} Sc x63

Row 13 (66st): [ Sc x15, Inc ] x 3, Sc x15

Row 14 (66st): {white} Sc x66

Row 15 (69st): [ Sc x21, Inc ] x 3

Row 16 (69st): {light blue} Sc x69

Row 17 (69st): Sc x69

Row 18 (69st): {white} Sc x69

Row 19 (69st): {dark blue} Sc x69

Row 20 (69st): Sc x69. Finish off & weave in all ends, no need to leave any tail here.

Part 3: Soup broth

This one’s a pretty straightforward plain brown disc. We’ll use double crochet here to leave large enough gaps in the stitches that we can weave the noodles in and out of it later.

Row 1 (12st): Using brown yarn, make a magic ring. Make 3 chain stitches, then Dc x11 in the loop. Join the circle with a slip stitch and pull the loop end to tighten.

Row 2 (24st): Ch 3. Dc in the same st as the chain. In each stitch for the rest of the round, Dc twice in each loop (double crochet increase – referred to from here on as DcInc). Join with Sl st.

Row 3 (36st): Ch x3, Dc in same st as ch, Dc, [ DcInc, Dc ] x11, join with Sl st

Row 4 (48st): Ch x3, Dc in same st as ch, Dc x2, [ DcInc, Dc x2 ] x11, join with Sl st

Row 5 (60st): Ch x3, Dc in same st as ch, Dc x3, [ DcInc, Dc x3 ] x11, join with Sl st.

If you place the disc inside the bowl, it should fit pretty closely. A little difference is no big deal, but you can always add/remove rows if you really need to. Finish off and weave in any loose ends.

Part 4: Noodles

This is the simplest part, it’s just going to be a long chain. Take your beige yarn and start making chain stitches until you reach somewhere around 55″ (140cm) in length. For me this was about 300-350 chain stitches, but you don’t need to count exactly. Weave the loose end back into the chain when you’re done.

Part 5: Boiled egg

Row 1 (6st): {yellow} Make a magic ring. Make 6 Sc in the loop and pull the end to tighten.

Row 2 (12st): In each of the loops in this round, make an Increase.

Row 3 (20st): For this row we’ll use some taller stitches on one side of the yolk to extend it into more of an oblong shape.

Switch to {white} and do [ Sc, Inc ] x3. Then start making it taller: Sc, ScInc, then Hdc and Dc in the same loop, and finally a TrInc (treble crochet increase). Going back down we’ll do it in reverse: Dc and Hdc in the same loop, and finish with ScInc in the last loop.

Here’s the whole row in short notation if you find it easier to read:
[ Sc, Inc ] x3, Sc, Inc, Hdc & Dc (in same loop), TrInc, Dc & Hdc (in same loop), Inc

Row 4 (20st): In each stitch of the previous round, make a back-loop only Sc to create a corner edge.

Row 5 (10st): Make a single crochet decrease (Dec) across each pair of stitches from the previous round. At this point you can tuck any loose threads inside the body of the egg before you close it up further, so that you won’t have to weave them in.

Row 6 (5st): Decrease again across each pair of stitches (Dec x5)

Row 7 (2st): Make two more Dec, and at this point it should be closed off enough that you can just pull it tight and finish off. The back of the egg won’t be visible in the final product anyway, so it doesn’t need to be perfect. Leave a tail for attaching the egg to the bowl later.

Part 6: Baby bok choy (make 2)

We’ll be making two of these. Similar to the egg, we’ll use stitches of varying heights to create the shape of the leaf.

Row 1: {white} Ch x10

Row 2: Turn the work so you are working back down the chain. Starting in second loop on the hook, Sc x9. Ch x1 and turn.

Row 3: Start working in the second loop on the hook. Make 2 Sc and one Sl st, then switch to {green}.

Carrying the white yarn along, do: Sc x2, Hdc x2, Dc, Dc x3 in next loop (triple increase), repeat another Dc x3 in next loop, Dc, Hdc x2.

Pick up the {white} again. Sl st in next loop, then finish off with 2 Sc.

Repeat steps 1-3 to make a second one. Weave in all ends except for a tail of white yarn for attaching later.

Part 7: Fish cake

This piece is a little tricky if you’ve never done a spiral crochet before. You can find lots of great tutorials online if you get stuck, but I’ll do my best to describe the technique here.

Row 1: Start with {pink}. Make a magic ring and Sc x6 in the ring. Do not tighten it yet! Take your hook out of the loop, being careful not to tug on it and undo your stitches.

Draw up a loop of {white} in the ring and make 6 Sc next to the pink ones. Now you can pull the ring tight. You should end up with a half-white half-pink colored circle with two working loops on opposite sides.

Row 2: Put your hook in the {white} working loop. Make 6 Sc, one in each of the pink loops on the previous row. Then take your hook out and pick up the {pink} loop again.

In the next 6 stitches, do an ScInc. Then 3 regular Sc in the next three loops. We’re done with the pink now, so you can finish it off.

Row 3: Pick the remaining {white} loop back up. Sc x15 (until you’ve stitched across every pink loop). Make a Sl st to join to the next white loop on the previous row, and finish off. Weave in all ends except for a tail of white yarn for attaching later.

Part 8: Assembly

If you’ve made it this far congrats! Now time to see it all come together. If you haven’t already, make sure you’ve woven in all the loose ends except for any tails you’ll need to attach things together (one tail on the bowl base, the egg, the fish cake, and one on each bok choy).

Before & after weaving in loose ends:

The first step is to stitch the bowl base onto the dish. Center the base on the bottom of the dish, add a tiny bit of stuffing if you like (just not so much that it bubbles out and makes it wobble), and stitch around the base to attach it.

Next we’;; weave the noodles into the soup broth. For this I used my largest tapestry needle and treated the noodle chain as if it were one thick piece of yarn.

If you don’t have a needle large enough, you can also use your crochet hook to pull the noodle strand through the holes. Just go in and out of the broth piece at random, leaving lots of extra length to let the noodle strand curl and tangle itself on the top. Try to cover the broth mostly evenly.

Now, arrange and loosely stitch down the remaining toppings onto your noodles & broth. You don’t need to worry about weaving in any loose ends, since everything on the bottom will just be stuffed inside the bowl and won’t be visible.

Finally, get out some stuffing and some extra white yarn (or whatever color you used for the bowl). Fill the bowl with stuffing, cap it off with your broth & toppings disc, and then stitch the broth to the inside of the bowl all the way around. And you’re finished!

Hope you enjoyed the pattern, please leave a comment here or on the Ravelry page if you tried it out! I’d love to see your results.

You can also support me by checking out my Etsy shop for a downloadable copy of this pattern, plus more patterns and stuff I’ve made (:

wild edible recipe: fireweed tea

fireweed (chamaenerion angustifolium)

also known as:

great willowherb, bombweed

habitat:

temperate climates, often in barren or disturbed soil such as areas recovering from wildfire

edible parts:

flowers, leaves, and stems

Fireweed was one of my first successful foraging harvests. I’d been spending a lot of time at a cafe where they sold fireweed tea, and it was one of my staple choices when I didn’t know what else to order. It’s a delicious, balanced tea – dark but not tannic or bitter; sweet but not cloying; and it has just a slight hint of something I can’t really describe that makes me think of campfires in the summertime. So when I discovered it grows natively all over the pacific northwest, I couldn’t wait to try making fireweed tea myself. It sounded fun, plus “free” is a hell of a lot cheaper than $8 an ounce or whatever they charge for it at a specialty tea shop.

If you’re looking for fireweed in your area, your best bet is to check places where the soil has been disturbed by fire or forestry. The common name “fireweed” might make you think of the 420 variety, but it has nothing to do with it. The name comes from the fact that it’s often one of the first plants to begin growing again after a wildfire, often prolifically since nothing else has started to grow in its way yet1sometimes fields of fireweed even are planted intentionally after prescribed fires to help restore the soil and prevent erosion! neat ๐Ÿ™‚. In the UK it’s sometimes called “bombweed” for a similar reason – it was common to see fields of it growing where bombs had fallen during WWII. Nowadays you’ll also often see fireweed growing along roadsides and highways, in open meadows, forest edges, and lots of other places. It’s happy to grow just about anywhere, and there isn’t any concern of overharvesting – the main thing to look out for is to pick a clean specimen. Avoid picking up roadside plants that are drenched in smog from vehicles, or might’ve been sprayed with pesticides.

identification

Identifying fireweed is easiest in the mid to late summer, after the characteristic pink-purple flowers have begun to bloom. It grows tall – sometimes up to 8 or 9 feet (2.5-3m) – so it’s usually easy to spot. Each fireweed plant is composed of a central stalk with long, narrow leaves sticking straight out from it.

When it’s in bloom, the top of the stem will transition from leaves into bright pink flowers, making it even more noticeable. If you’re hunting for it earlier in the summer, you’ll just see clusters of pinkish-white buds.

lookalikes

There’s not much risk of confusing fireweed with another plant as long as you’re paying attention, but two that might look similar from a distance are purple foxglove and lupines.

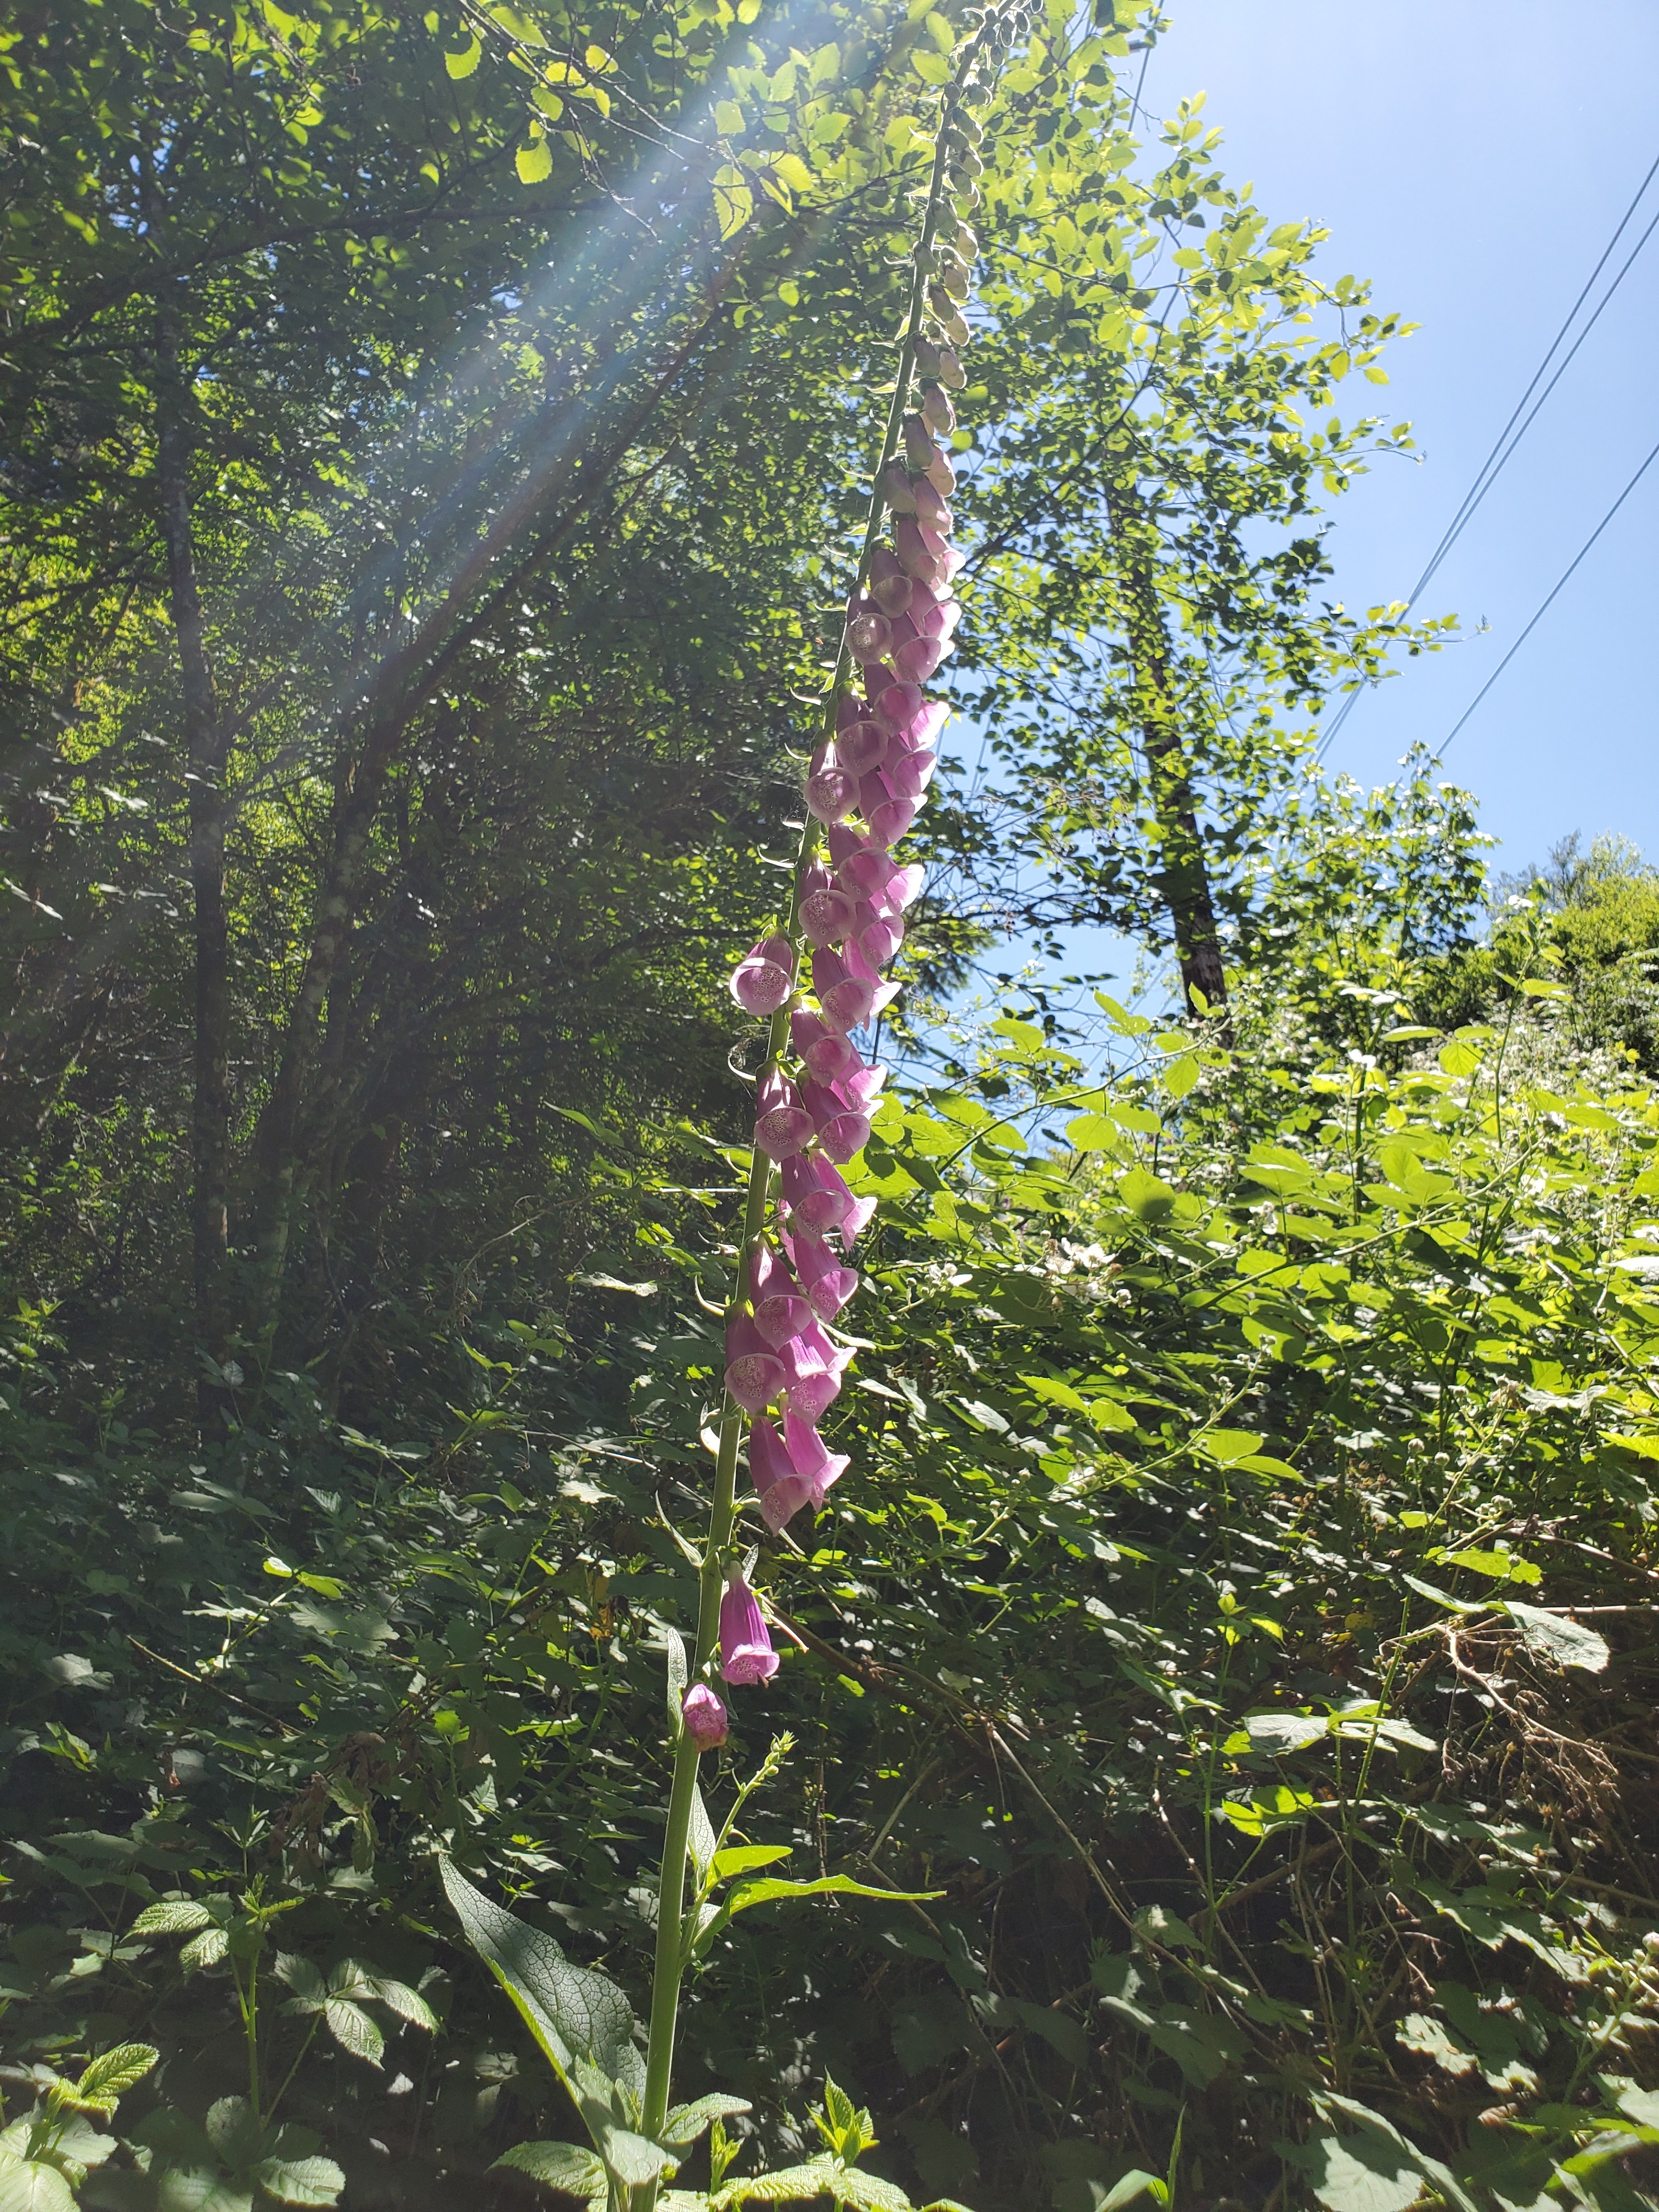
The key differentiating factor for Foxglove is the flowers: they’re noticeably larger and bell-shaped, instead of fireweed’s small, narrow blooms. They also tend to hang only on one side of the stalk, instead of being evenly distributed all the way around.

For Lupines, you’ll want to look at the leaves. While they are also somewhat long and narrow, the leaves are in separate bunches on multiple stems instead of one central stalk. You’ll also often notice small fuzzy looking pea pods growing on top, since lupines are part of the pea family.

harvesting & edibility

Most of the fireweed plant is edible, though I don’t really recommend eating it raw2if you do, choose young leaves and stalks. older leaves will be tough and not as flavorful. The most common preparations are to ferment the leaves as a tea, or (apparently, as I found out while writing this post) to use the flowers to make a jam. I’ll have to try that sometime.

For tea purposes, just grab a stalk and run your hand down it to remove the leaves. I usually get a mix of young and old leaves, since the younger ones tend to be sweeter, so if you only go for those you’ll end up with a much sweeter tea. If you prefer that though, go for it – and grab some flowers while you’re at it, since those can be tossed in with the leaves and will add a significant amount of additional sweetness as well. Personally I find it sweet enough already though, so I stick with just leaves. Read on for the recipe.

recipe: fermented fireweed tea

Ingredients

  • freshly harvested fireweed leaves (optionally, flowers too – see notes)

Directions

  1. Clean: Rinse to remove any dirt or debris, and dry thoroughly. A salad spinner works great, or you can pat dry and spread the leaves out on a drying rack for a little bit
  2. Ferment: Prepare some clean jars or storage containers with lids to contain the fireweed while it’s fermenting. Taking leaves a handful at a time, tear them a few times and then crush and roll them in your palms to get them to release as much of their natural oils as possible. Add the crushed leaves to the prepared containers and seal the lids. Place them in a cool, dry location for 2-3 days.
  3. Dry: After a couple days fermentation, the containers should have a distinctly sweet scent when opened. (note: There should not be mold, though! if you do have mold, it’s likely that the leaves weren’t dried well enough after washing, and need to be tossed out). Spread leaves in a single layer in a dehydrator. Dry at 90F (32C) for about 4-6 hours or overnight, until leaves are completely dried and brittle.
  4. Store in an airtight container until ready to make tea.

Notes

  • If you like a sweeter tea, you can also add fireweed flowers to the mix. Treat them the same as the leaves.
  • 500 grams of leaves will result in approximately 100 grams of dried tea

footnotes

  • 1
    sometimes fields of fireweed even are planted intentionally after prescribed fires to help restore the soil and prevent erosion! neat ๐Ÿ™‚
  • 2
    if you do, choose young leaves and stalks. older leaves will be tough and not as flavorful

recycling plastic bags into coozies (free crochet pattern)

Single-use plastic sucks a lot, and especially since we’ve been finding out that plastic recycling basically doesn’t work and even if you try to recycle it, it probably ends up in a landfill anyway. In many countries and cities, governments are making active steps to reducing this, but reducing your plastic bag accumulation is not an option everywhere. Maybe you live somewhere that’s stubbornly holding on to single-use plastic because otherwise a bunch of CEOs might only get most of the money instead of all of it. We wouldn’t want that to happen. Those poor rich CEOs.

So despite your best efforts you might still find yourself with some of those overflowing “bags-full-of-bags” hanging in your closet. The good news is, there are things you can do with all that plastic, like finding a local store that does plastic film recycling, where it’ll be turned into composite lumber or other building materials.

Here’s another thing you can do: make it into plastic yarn1aka “plarn”, if you like smashing words together and turn your plastic stash into something you can actually use. My favorite thing to make is can coozies2koozies? cozies? I can’t find a consensus on how to spell it. The plastic ones are durable, flexible, functional, and I actually think they look pretty cool. A lot cooler than the free ones you have laying in your junk drawer with the logo of a bank or insurance company or whatever on them. And imagine how much neighborhood clout you can get when you show up at the next barbeque with your can of cheap beer in a homemade, upcycled plastic bag coozie3“oh this? yeah it’s nothing, just something I made”. Let’s get started.

Pattern: the short version

Skip ahead to the long version for a full step-by-step guide with pictures

Recycled plastic bag coozie

Materials

  • about 4 plastic grocery bags
    • note: Amount varies depending on how thick the plastic is. If you have those heavy reusable plastic bags, you may only need 2 or 3.
  • scissors
  • 6mm (size J) crochet hook
  • a can or bottle for size reference

Crochet stitches & shorthand

  • st: stitch
  • sl st: slip stitch
  • ch: chain stitch
  • hdc: half double crochet
    • (US terminology – equivalent to UK half treble)
  • BLO: work in back loop only
  • [#st]: number of stitches in this row

Directions

Part 1: Making the plastic yarn (“plarn”)

  1. Lay out a plastic grocery bag on a table and find the bottom seam. Cut along the seam to remove it. This will allow the bag to be fully opened up and flattened.
  2. Cut off the handles of the bag and straighten out the edges. You should end up with a big tube of plastic.
  3. Starting from where you cut the handles, cut into the bag at a slight angle to about an inch and a half (~4cm) depth. Then begin cutting a strip of plastic parallel to the top edge, keeping it about the same width as you go.

note: I’ve found about 1.5″ to be the right width for most standard grocery bags. If you’re using a thicker plastic bag, the yarn will be easier to work with if you make the strips narrower. On the other hand, for thin plastics, it tends to break if you go too narrow. If you’re using a non-standard bag, you may have to experiment a bit to find the sweet spot.

  1. Continue cutting the strip, turning the bag as you go, in sort of a spiral fashion. You want to end up with one unbroken strip of plastic.
  2. When finished, gently wind the plastic yarn into a ball. Be careful of pulling too hard, or it will stretch and weaken.
  3. Repeat for the remaining bags

Part 2: Crocheting the coozie

note: The chain stitches at the start of each row count as one hdc for the purpose of counting stitches.

tip: Throughout the project, keep a loose grip and don’t pull your stitches too tight. The plastic strips can be somewhat delicate, and if you yank too hard it’ll stretch out and break.

  1. [8st] Start with a magic ring. Make 2 ch stitches, then 7 hdc. Sl st to join.
  2. [16st] Ch 2, then hdc in the same st as the ch. Hdc twice in each st the rest of the way around. Sl st to join.
  3. [24st] Ch 2, hdc in same st. Hdc in next st. Then repeat the rest of the way around: Hdc two in same st, then one hdc in next st. Sl st to join.

At this point, take a moment to compare the size of your circle to the bottom of a can. It should be roughly the same diameter. A little bigger or smaller is fine, since the plastic will flex and stretch a bit. If it’s significantly smaller, you can add additional rows following the same pattern as we’ve done so far, just add one more single hdc in between each increase hdc (eg. for the next row, you would repeat: hdc twice in one st, then one hdc in each of the next two st, and so on).

  1. [24st] Ch 2, then hdc in BLO of each st all the way around. Sl st to join.
  2. [24st] Ch 2, then hdc in each st around. Sl st to join.
  3. to 13. [24st] Repeat row 5 for the remaining rows. I like to switch colors after about 3 or 4 rows, but you can do whatever pattern you like. You can also adjust the height by adding/removing rows as needed, just compare it to your reference can as you go until you’re happy with the size.
  4. Optionally, if you’d like to add a finger loop for carrying: After finishing off your last hdc row, ch 6. Skip 2 stitches from where you started chaining, and re-attach to the third st with a sl st to make the loop. You can also go back over the top of the chains with a row of single crochet if you want to add extra reinforcement.

Pattern: the detailed version

Part 1: Making the plastic yarn

Here’s everything you need to get started! Just some scissors, a 6mm (size J) crochet hook, and any can or bottle to use as a reference for sizing. And of course, some plastic bags.

From my experience, it takes around 4 grocery bags to make one coozie. It does depend a little bit on the type of bag you have though. Some stores have switched to a much thicker reusable plastic bag, which I’ve found is not as good for this method since it’s stiffer and harder to work with. Thin bags are generally easier, but you can make do with whatever you have available.

To start making plastic yarn, spread out the bag flat on a work surface. We’re going to trim off a few bits so that the resulting yarn is consistent and less prone to breakage.

First, remove the seam from the bottom of the bag. This will let us unfold it all the way.

Cut carefully along the edge of the seam, trying to keep all the folded layers stacked neatly so you don’t end up with a bunch of jagged edges.

Now flatten it out again and smooth out the layers that were held together by the seam. You should end up with something like this.

Next, cut off the handles at the top, plus any other inconsistent bits so you end up with one smooth line across.

The handles and seam that you removed aren’t going to be used in this project, but you can always reuse them in other ways. Extra plastic bits are great to use as filling for stuffing cat toys, since it makes a fun crinkly noise. Just make be careful to seal it well so no plastic bits can escape and get swallowed.

At this point you should be left with a big rectangular plastic tube that looks something like this.

Now we can start cutting plastic strips that will become the yarn.

At one of the ends, working on only a single layer (!!), cut at an angle to a depth of about an inch and a half (~4cm). Then start cutting a long strip, parallel to the edge of the bag.

If you are using one of those thicker plastic bags, make your strip narrower than this (more around 3/4″ or 2cm). It’ll result in a less stiff yarn that will be easier to work with.

From here, just keep cutting in a straight line, turning the bag as you go, in sort of a spiral pattern. Try to maintain roughly the same width the whole time.

Once your whole bag is cut into one unbroken strip, you can gently wind it into a ball. I usually just wrap it around my fingers, slightly twisting it as I go to make it more yarn-like.

Note: Don’t tug or pull too hard while doing this, since the plastic is pretty fragile and will stretch out and break if you use much force.

And here is the result. Repeat the process for the remaining bags.

I usually do 4 bags per coozie, 2 of each color.

Part 2: Crocheting the coozie

Note before we get started: I’m going to assume you are familiar with basic crochet techniques for this pattern. It’s definitely beginner-friendly though, so don’t worry. The only stitches/techniques you need to know are:

  • Making a magic ring
  • Chain and slip stitches
  • Half-double crochet stitch (or in UK terminology: half-treble crochet)
  • Working in the back loop only

If you can do all of that, you’re golden. Take a quick refresher if you need to, and let’s get started.

Row 1:

To start the coozie, make a magic ring. Chain 2 in the ring, then make 7 half-double crochet (hdc) stitches.

Very gently tug the end to tighten the loop (if you pull too hard you’ll stretch and break the yarn), then slip stitch to the initial chain stitches to close.

Row 2:

Chain 2 to start new row. Hdc once in the same stitch as the chains. Then do two hdc in each stitch the rest of the way around, and slip stitch to join. Counting the 2 chain as one stitch, you should have a total of 16.

Row 3:

Chain 2, then hdc in the same stitch (same as last row). In the next stitch, do one hdc. Then two hdc in the following stitch. Repeat the rest of the way around like this, alternating between one hdc and two hdc in each stitch. Again counting the 2 chain as one, you should have a total of 24 stitches at the end. Slip stitch to join.

Now we want to take a minute to check the size to make sure we got it right. Compare your crocheted circle to the bottom of a can or bottle and make sure it’s roughly the same diameter. A little larger or smaller is fine, since it’ll be flexible enough to accommodate some slight difference.

In case it’s significantly too small, you can add another row following the same pattern as the previous one, except add an additional hdc in between each double hdc (so, hdc twice in one stitch, then one hdc in next two stitches, and repeat).

Or if it’s too large, like if you’re making a coozie for one of those skinny cans, you can backtrack and remove a row.

Row 4:

Now we want to change direction and start adding height. To do this, we’ll do the next row working in only the back loops of the previous row.

Chain 2 like usual, then do one hdc in only the back loop of each stitch all the way around, and slip stitch to join. It should be the same total stitches as the previous row (24, unless you added an extra row, then it’ll be 32).

Rows 5+:

From here it’s really simple, we’re just going to work straightforward rows of normal hdc’s the whole way around, starting with 2 chain stitches, and ending with a slip stitch to join. Each one should be 24 total stitches (or equal to however many your last row was, if you added/removed rows earlier).

I like to change colors after about 3 or 4 rows, usually this is when I run out of my first color of yarn so it works out pretty well. You could also just do a solid color, or stripes, or whatever you want really. The color variation from the different patterning on the plastic is what makes these unique, so don’t stress about making it perfectly uniform.

The height of your coozie is up to you – I generally end up around 13-14 total rows, but it can vary depending on the thickness of the plastic you’re using, and how tight or loose you’re making your stitches. Just compare it to a can or bottle for reference until you’re happy with the height.

Adding a finger loop

I like to add a loop at the top of my coozies so they’re easy to carry. It’s also nice for clipping it on to a bag, or hanging it for storage.

To make the loop, don’t cut off your extra yarn yet after you finish your last row. Instead, make 6 more loose chain stitches. Then, skipping 2 stitches from where you started the chain, re-attach the end of the chain with a slip stitch to the previous row.

If you want to reinforce the loop to make it a bit more sturdy, you can turn and go back over each of the chain stitches with a single crochet to make it thicker.

And that’s all there is to it. Once you get the hang of working with the plastic yarn, you can whip these out really quickly, and your stash of plastic bags will be gone before you know it.

footnotes

  • 1
    aka “plarn”, if you like smashing words together
  • 2
    koozies? cozies? I can’t find a consensus on how to spell it
  • 3
    “oh this? yeah it’s nothing, just something I made”

wild edible recipe: yarrow tea

common yarrow (achillea millefolium)

also known as:

yarrow, milfoil

habitat:

nearly everywhere except parts of africa and southern asia

edible parts:

entire plant

Yarrow is a plant that’s easy to recognize, it’s got these frilly feathery leaves that really don’t look like anything else that I can think of. Mature yarrow plants will also have bunches of little white flowers at the tops that look kinda like queen anne’s lace, but the ones I saw when I took the photos for this post were mostly younger plants, which just have these cute fuzzy balls of future flowers that haven’t bloomed yet.

You can find it pretty much anywhere across the world; it’s native to temperate areas in the northern hemisphere, but has been introduced in much of the southern hemisphere as well. It’s a hardy plant that doesn’t need much to grow, so you’ll often see it widespread in places that other plants have trouble flourishing in – like in sand or on rocky mountainsides. In many places it’s considered invasive, so you don’t need to worry about overharvesting it.

The good news about yarrow is that the whole plant is edible. The bad news is you probably don’t want to. It’s bitter stuff, and has this strong medicinal sort of smell to it. Yarrow is a common ingredient in traditional medicine, and still today there are a lot of claims out there about different health applications of it. But that’s not the kind of forager I am, so we’ll just skip that part, yeah?

Medicinal claims aside, I’ve definitely heard the words “yarrow tea” used in a positive way before, I think. And I like to try everything even if it seems like a bad idea1especially if it seems like a bad idea, so I have prepared yarrow tea before. Here’s how I made it and what I thought about it.

Yarrow tea recipe – the short version

recipe: dried yarrow tea

Ingredients

  • freshly harvested yarrow leaves

Directions

  1. Rinse thoroughly to remove any dirt or debris. Dry in a salad spinner if you have one, or just pat dry with a clean towel.
  2. Strip the frills from each leaf stem. They should come off easily by just grasping the stem tightly and running your fingers down it.
  3. Spread yarrow leaves in a single layer in a dehydrator. Dry at 90F (32C) for a few hours or overnight, until leaves are completely dried and brittle.
  4. Store in an airtight container until ready to make tea.

Yarrow tea recipe – the long version

Usually when I pick something I haven’t tried before, I start with the good old scratch-and-sniff technique. It releases all the oils in the leaf, so it’s a good way to get the “essence” of a plant. When I did this with yarrow, I got smacked in the face with a strong, bitter smell. This tempered my expectations a lot of the final result, so I didn’t pick a whole lot of it. Just one or two small plants.

I gave the leaves a good rinse, but didn’t really bother removing the dried out brown leaves. I figured that I’m going to be drying it anyway, so why waste the effort?

The leaves seemed less bitter than the stems, so I focused on those and tossed the stems out. I just sat down and stripped the frilly bits off each stem by pinching them and running my fingers down it.

This was my favorite part actually. Very meditative and satisfying.

I ended up with maybe around a cup and a half of leaves after I was finished. I forgot to actually weigh it though.

These were then spread on a dehydrator tray, along with a bunch of other things I’d foraged that day, and left to dry overnight at about 90 or 100 degrees F.

And after all that effort, the result was a pretty gross tea, at least to my tastebuds. It was really bitter with a strong medicinal/piney smell2actually though I’d describe IPAs in the same way and a lot of people seem to like those, so maybe some people would really enjoy this tea.. My partner didn’t hate it as much as I did, so take my opinion with a grain of salt. Could be something you develop a taste for. I could also see some potential usecase where you add this to a sweet tea blend to balance it out maybe.

FORAGING SCORE: 9 / 25

VERDICT: bitter and medicinal, hard pass.

ease of harvesting
/ preparation
4 / 5
some effort but it was pretty chill, I liked the process of removing the leaves
edibility2 / 10
I can see this being good as a balancing element in an otherwise sweet tea. also maybe if you like bitter piney flavors you might dig this, idk.
overall enjoyment3 / 10
it’s quite pretty, I’ll probably plant some in my yard. but not for eating, for me anyway

footnotes

  • 1
    especially if it seems like a bad idea
  • 2
    actually though I’d describe IPAs in the same way and a lot of people seem to like those, so maybe some people would really enjoy this tea.

how I got into foraging

I’m pretty new to the world of botany. I started getting into plants last year, when my partner and I were staying at an airbnb near mount baker in the north cascades. It was early spring, and both of us as non-native-pacific-northwesterners had never really experienced a temperate rainforest before. I mean shit, neither of us even knew that rainforests existed outside of the tropics before we moved to this area. We were absolutely not prepared.

That weekend we wandered down a nearby trail, jaws dropped, in awe of how prehistoric everything looked. The moss covers every inch of available space, softening every sound in the same way as a freshly fallen snow. The sprawling ferns and massive trees make you feel small, but in a good way, in the kind of way that makes you feel comforted and safe knowing that these ancient giants have been here for ages, and will (I hope) continue to be there for many more ages to come.

Back at our cabin, in an attempt to stay ‘off the grid’ and avoid the urge to doomscroll through the news on my phone, I browsed the bookshelves. I’m pretty sure they didn’t expect anyone to actually read these books, by the way. This was the kind of bougie cabin where everything is pristine and curated, and every item arranged on the scandinavian-meets-mid-century wood furniture is chosen more for the aesthetic and vibe1and don’t forget, everything has to be “hygge”. describing your airbnb as hygge is like putting “I love to travel!” in your tinder profile. I mean, there’s nothing wrong with it (liking popular things is ok and you should never feel bad about it, fuck gatekeepers), but I do find it amusing sometimes. that it evokes rather than its content. One of those items was this antique 1940’s book about the native flora and fauna of the pacific northwest, which didn’t actually teach me anything about foraging2although it did teach me one of my favorite fun plant etymology facts. do you know where the word “daisy” comes from? Daisies bloom in the sun and close up their petals at night, so they were called “day’s eyes”, which was eventually smashed and shorted into just “daisies”. neat!, but it did make me stop and think, hey, aren’t some of those plants we just saw edible? fiddlehead ferns3raise your hand if you first learned about fiddlehead ferns from playing stardew valley. Yeah, me too. No shame. Everything you know had to be learned at one point. are a thing you can eat, right?

I was fascinated, and knew I’d just found a new target for my hyperfocus to fixate on and obsess over. After a quick google session and a couple of e-book purchases, I spent the next few hours consuming as much content about foraging as I could, ready to go out on the trail again and see if I could find any of these fiddleheads. We did find some of course – tons of them actually. Once I started paying attention, suddenly the forest came alive with fascinating discoveries. What used to look like a homogeneous blur of leaves and fuzzy moss suddenly became something so much more. I snapped pictures of every interesting plant I came across while we filled our pockets with fiddleheads.

Here’s a couple of my favorite shots.

This is a type of birds-nest fungi, and although they are not edible, they are absolutely fascinating nonetheless because of the way they reproduce. Like other fungi, they spread using spores, but it looks nothing like your typical umbrella-shaped toadstool. Look closely at the little cups, see how some have small black seed-shaped discs inside or around them4here’s a closeup:? Those are the spores, and they rely on the rain to distribute them. As the cup fills with water, the spore “seeds” get splashed out by raindrops, scattering them around. It’s a clever and fascinating reproductive method specifically adapted to this exact environment, and honestly I just think these little guys are ridiculously cute. Every time I spot some of them I have to stop and take a million close-up pictures, they’re just too damn cool.

Pacific Trillium is one of my favorite wildflowers. It pops up only briefly in the early days of spring, often disappearing before other wildflowers have even opened their blooms yet. There’s something about the simplicity and perfectly arranged layers of three leaves, three bracts, and three petals that I just find beautiful. But they are extremely fragile and should not be touched. Disturbing or plucking the flower can ruin its ability to photosynthesise, and can potentially kill the plant, preventing it from coming back next year.

When we got back to the cabin, we cooked up the fiddleheads we harvested and added them to the pasta dish we had planned to make for dinner. They did taste good, but that wasn’t really the only thing that hooked me on foraging. It was this crazy sense of discovery, of never knowing what you might find around the next trailbend. I told my partner that it felt like “adult easter egg hunting”.

Most of what I spotted wasn’t edible (or just wouldn’t be tasty), but I couldn’t believe how many fascinating plants and fungi there were to be found once you start actually looking closely. It’s not like I’d never hiked or camped before, I just never really paid attention. I didn’t dislike hiking, but I’d often get bored quickly and spend most of the hike lost in my thoughts, not really looking around, just mindlessly going forward.

Before that day, the woods were all the same to me.

Afterwards, they would never look the same again.

footnotes

  • 1
    and don’t forget, everything has to be “hygge”. describing your airbnb as hygge is like putting “I love to travel!” in your tinder profile. I mean, there’s nothing wrong with it (liking popular things is ok and you should never feel bad about it, fuck gatekeepers), but I do find it amusing sometimes.
  • 2
    although it did teach me one of my favorite fun plant etymology facts. do you know where the word “daisy” comes from? Daisies bloom in the sun and close up their petals at night, so they were called “day’s eyes”, which was eventually smashed and shorted into just “daisies”. neat!
  • 3
    raise your hand if you first learned about fiddlehead ferns from playing stardew valley. Yeah, me too. No shame. Everything you know had to be learned at one point.
  • 4
    here’s a closeup: