here’s a fun little project I did this weekend after a goodwill trip. I wanted somewhere to hang my necklaces up in my bedroom, since I love wearing extra-long pendants and they are perpetually a tangled mess in my jewelry box. I had the idea of a sort of shadowbox type of thing that I could stick pins into and hang my necklaces on.
I’d had this project in the back of my mind for a while, so when I spotted this ugly-ass sign at goodwill that had a nice deep frame, I tossed it in my cart and was only mildly embarrassed to be seen purchasing it. seriously, I cannot tell you how much I dislike inspirational-quote-based home decor. so I was actually quite satisfied that I’d be able to turn it into something actually worth hanging up.
first things first, we need some kind of backing material that will be good for sticking pins into. cardboard is the simplest solution and as a bonus it’s essentially free, so I trimmed a piece of an old box to fit snugly into the frame.
then I needed to cover it with something that looks nice. I had this fabric scrap laying around that I got in one of those mismatched remnant grab bags you can get from fabric sellers sometimes. I love buying these cause you get a wide variety of fabrics that you might not have otherwise picked out, and you get to save something that would have probably been thrown out otherwise.
I laid out the cardboard on my fabric scrap and cut it about 1″ larger than the board on all sides, then wrapped it around the edges and clipped in place. in retrospect this was maybe a little bit too snug. it’s a pretty thick upholstery-type fabric, so I ended up needing to stretch it a bit tight and use a really small seam allowance. it worked out, but cutting a bit more extra would have made things easier.
I stitched around 3 of the 4 sides, just going straight through the cardboard – only broke one needle, so I was pretty happy with how well my sewing machine did on such a thick, layered object.
I wanted it to have a bit of depth to it, so I opened up the unstitched bottom edge and loosely filled it with a bit of stuffing. it came out a little on the lumpy side, so I’m thinking it would’ve been better to use a slab of batting or foam here instead. but stuffing was what I had on hand, so that’s what I used. after stuffing, I went back to the sewing machine and closed up the remaining edge.
finally, all that’s left is to put it all together. the covered board fits very snug in the frame so it actually holds quite well on its own, but as a little extra insurance I gave it a good spray with some tacky adhesive. I know I have some stronger spray adhesive laying around somewhere, but I couldn’t find it. the tacky spray turned out to be plenty strong enough though (well, it hasn’t fallen off yet at least).
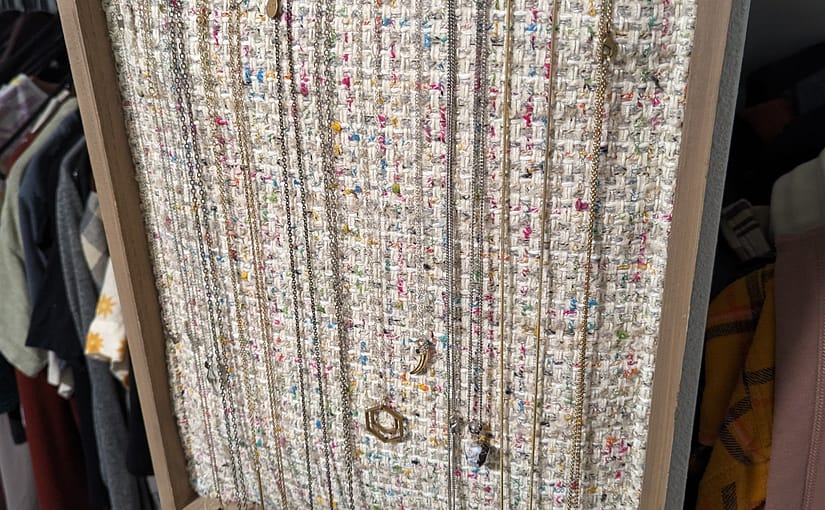
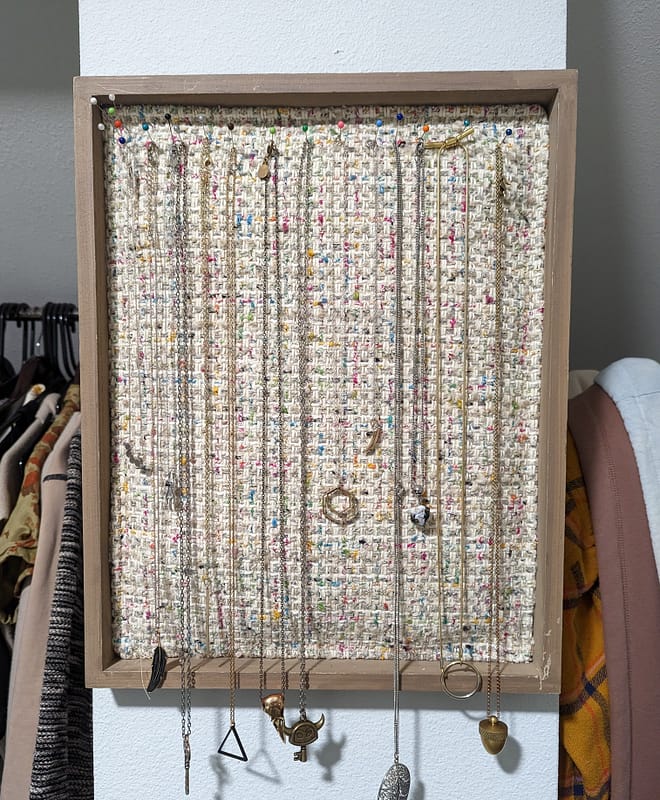
and here’s the finished product! turns out, my necklaces are way too long so they don’t actually all fit within the frame (bummer) but I think it looks pretty cool anyway! and it’s definitely way better than my old solution of throwing them all into a box and hoping they wouldn’t get too tangled. so I’ll be on the lookout for a larger deep frame to make another one at some point!
Honestly, is there anything more satisfying than pulling from a perfect center-pull yarn ball? Well, ok, there probably is, but this is definitely one of my favorite simple pleasures. Crochet for me is mostly about the chill satisfying vibes and the enjoyment of seeing something created from nothing, stitch by stitch and row by row. Finishing projects isn’t really my specialty anyway, yknow? So I’m all about enjoying the journey.
Even though I own an automatic yarn winder, one of the things I really enjoy is hand-winding my yarn balls. It’s one of those simple, satisfying tasks that I can just zone out to. And I need to do it pretty often, because I have a lot of tangled clumps of yarn.
See, I used to have a bad yarn-buying habit. I think most crafters can relate1and if you don’t, TELL US YOUR SECRETS, HOW DO YOU DO IT??. There’s so many gorgeous yarns out there, and whenever I find myself in a craft store, it is so hard not to just walk out with a huge bag full of yarn. Even though I have zero concrete plans for what I’d do with it, I just want it because it’s beautiful and gets me all dreamy about all the things I could make.
But it’s a bad habit for a lot of reasons. What you end up with is a bunch of random yarn, but never the right yarn for the project you want to do. So whenever you start making something, you inevitably have to go get new yarn anyway, and all the stuff you bought “just because” continues to sit there in your disorganized mountain of yarn forever and never gets used.
YARN HOARDER DETECTED
Recently I made it a goal to change this. I’m working on being more sustainable and reducing my consumption, and craft supplies were a big part of what I was buying. I just kept acquiring more and more and more, and honestly part of me doesn’t want to stop, cause my stash makes me really happy and I do like having a good amount yarn on hand for spontaneous projects.
So I made a compromise – I can acquire as much new yarn as I want, as long as it’s secondhand or salvaged. Sometimes I do let myself buy a little bit of new yarn if I really need something specific to finish a project, but I’ve been trying to use what I have as much as possible. It turns out to be a pretty fun creative challenge actually, being constrained by only being able to use what you already have.
Ok, back to yarn-winding. I swear, I’m getting to the point eventually. So, what happened when I started getting a lot of yarn secondhand is that most of it comes a knotted, unusable clump. As a result, I like to think I’ve gotten pretty good at untangling and rewinding it into nice, tidy little yarn balls.
A while back I’d bought a Nostepinne, which is this old-school traditional yarn winding device that’s basically just a smooth, tapered wooden stick. It’s kinda funny actually, a lot of internet reviews you’ll find are from people who bought them to use as a wand for their kid’s wizard halloween costume.
It’s the perfect tool for hand-winding though. I keep it in my crochet bag so if I’m working on a project and my yarn ball starts to collapse and fall apart, I can just quickly re-wind it back into shape. It also takes up wayyyy less space than one of those automatic yarn winders, and doesn’t take any setup, which is a huge benefit if you’re living in a small apartment and don’t have the luxury of a dedicated crafting space.
In a pinch, you also can use any other roughly stick-shaped object to hand-wind your yarn – I’ve done it on a spare crochet hook, on a sharpie marker, and even on my own finger – but I have to say it’s definitely best to use an actual Nostepinne if you have one. I will admit I’m not 100% sure if my method for using it is the “correct” way, but it works for me every time, so here we go!
tutorial: how to wind yarn using a nostepinne
1. prepare materials
In this tutorial, I’ll be working from some yarn that came in a hank (the figure-8 kind of yarn ball). A lot of yarn is sold in hanks, but they’re hard to work from directly and will inevitably end up in a tangled wad if you don’t re-wind them, so it’s a good time to try out your nostepinne.
To get started from a hank, carefully untwist it and lay it flat in a circle shape like shown in the picture. Note: it is extremely important to maintain the integrity of the circle while you work (harder than it sounds!). It helps to have a clear space in front of you where you can lay out the yarn so it doesn’t get messed up.
If you’re starting from completely unwound yarn, just do your best to untangle it and lay it out in a loose circle similar to the hank. You might need to stop and deal with some knots along the way, but it won’t really change the process.
2. attach yarn
Near the handle part of the nostepinne, you’ll see a couple of grooves. These are for holding your loose yarn end which will eventually become the center strand that you’ll pull from. Wrap the end around one of the grooves, leaving a short tail that you can grasp onto, and tie a loose knot.
3. lay down the base
We’ll start by wrapping a couple base layers of yarn. This forms the center of your yarn ball and helps the outer layers to have something to grip onto.
Take the nostepinne in your non-dominant hand (left hand for right-handers; right hand for left-handers) and use your other hand to wrap a single layer of yarn, moving from the base of the stick towards the end. The base layer doesn’t need to go the full length of the nostepinne, but give yourself a few inches to work with.
Now, reverse direction (moving from the end of the stick towards your hand) and lay down another flat layer on top of the first one. Repeat a couple more times to add structure to your base so it all holds together.
4. wind, wind, wind
Ok, that’s all the setup! From now on it’s just winding until you run out of yarn. Once you get into the rhythm of it, it’s really simple. Here’s the process.
Starting roughly in the center of your base, begin wrapping your yarn at an upward angle. While you wrap, gradually turn the wand towards you, to keep moving your yarn so that it lays flat next to the last loop.
That may be a bit hard to understand just from text, so here’s some diagrams to help:
At first it’s gonna look pretty messy, but keep at it for a bit and you’ll start to see it take shape into a square-ish ball with rounded corners. Eventually your yarn ball will grow to the point where you can’t see the base layer anymore.
5. finishing off
Once you run out of yarn, you should end up with something like this:
To finish it off, tuck the loose end into the outer layer, untie your starting yarn, and slide the whole ball off the stick.
✨ finished! ✨
and there you have it! Ain’t that a thing of beauty.
It might take a few tries to get the hang of it, but once you do, it’s pretty relaxing. I can whip up one of these balls in under 10 minutes if my yarn is cooperating and doesn’t decide to tangle up.
I hope this was a useful guide for y’all, and I’d love to hear from you in the comments if you know of any other useful tricks or have questions about the tutorial 🙂 thanks for reading!
footnotes
1
and if you don’t, TELL US YOUR SECRETS, HOW DO YOU DO IT??
Single-use plastic sucks a lot, and especially since we’ve been finding out that plastic recycling basically doesn’t work and even if you try to recycle it, it probably ends up in a landfill anyway. In many countries and cities, governments are making active steps to reducing this, but reducing your plastic bag accumulation is not an option everywhere. Maybe you live somewhere that’s stubbornly holding on to single-use plastic because otherwise a bunch of CEOs might only get most of the money instead of all of it. We wouldn’t want that to happen. Those poor rich CEOs.
So despite your best efforts you might still find yourself with some of those overflowing “bags-full-of-bags” hanging in your closet. The good news is, there are things you can do with all that plastic, like finding a local store that does plastic film recycling, where it’ll be turned into composite lumber or other building materials.
Here’s another thing you can do: make it into plastic yarn1aka “plarn”, if you like smashing words together and turn your plastic stash into something you can actually use. My favorite thing to make is can coozies2koozies? cozies? I can’t find a consensus on how to spell it. The plastic ones are durable, flexible, functional, and I actually think they look pretty cool. A lot cooler than the free ones you have laying in your junk drawer with the logo of a bank or insurance company or whatever on them. And imagine how much neighborhood clout you can get when you show up at the next barbeque with your can of cheap beer in a homemade, upcycled plastic bag coozie3“oh this? yeah it’s nothing, just something I made”. Let’s get started.
note: Amount varies depending on how thick the plastic is. If you have those heavy reusable plastic bags, you may only need 2 or 3.
scissors
6mm (size J) crochet hook
a can or bottle for size reference
Crochet stitches & shorthand
st: stitch
sl st: slip stitch
ch: chain stitch
hdc: half double crochet
(US terminology – equivalent to UK half treble)
BLO: work in back loop only
[#st]: number of stitches in this row
Directions
Part 1: Making the plastic yarn (“plarn”)
Lay out a plastic grocery bag on a table and find the bottom seam. Cut along the seam to remove it. This will allow the bag to be fully opened up and flattened.
Cut off the handles of the bag and straighten out the edges. You should end up with a big tube of plastic.
Starting from where you cut the handles, cut into the bag at a slight angle to about an inch and a half (~4cm) depth. Then begin cutting a strip of plastic parallel to the top edge, keeping it about the same width as you go.
note: I’ve found about 1.5″ to be the right width for most standard grocery bags. If you’re using a thicker plastic bag, the yarn will be easier to work with if you make the strips narrower. On the other hand, for thin plastics, it tends to break if you go too narrow. If you’re using a non-standard bag, you may have to experiment a bit to find the sweet spot.
Continue cutting the strip, turning the bag as you go, in sort of a spiral fashion. You want to end up with one unbroken strip of plastic.
When finished, gently wind the plastic yarn into a ball. Be careful of pulling too hard, or it will stretch and weaken.
Repeat for the remaining bags
Part 2: Crocheting the coozie
note: The chain stitches at the start of each row count as one hdc for the purpose of counting stitches.
tip: Throughout the project, keep a loose grip and don’t pull your stitches too tight. The plastic strips can be somewhat delicate, and if you yank too hard it’ll stretch out and break.
[8st] Start with a magic ring. Make 2 ch stitches, then 7 hdc. Sl st to join.
[16st] Ch 2, then hdc in the same st as the ch. Hdc twice in each st the rest of the way around. Sl st to join.
[24st] Ch 2, hdc in same st. Hdc in next st. Then repeat the rest of the way around: Hdc two in same st, then one hdc in next st. Sl st to join.
At this point, take a moment to compare the size of your circle to the bottom of a can. It should be roughly the same diameter. A little bigger or smaller is fine, since the plastic will flex and stretch a bit. If it’s significantly smaller, you can add additional rows following the same pattern as we’ve done so far, just add one more single hdc in between each increase hdc (eg. for the next row, you would repeat: hdc twice in one st, then one hdc in each of the next two st, and so on).
[24st] Ch 2, then hdc in BLO of each st all the way around. Sl st to join.
[24st] Ch 2, then hdc in each st around. Sl st to join.
to 13. [24st] Repeat row 5 for the remaining rows. I like to switch colors after about 3 or 4 rows, but you can do whatever pattern you like. You can also adjust the height by adding/removing rows as needed, just compare it to your reference can as you go until you’re happy with the size.
Optionally, if you’d like to add a finger loop for carrying: After finishing off your last hdc row, ch 6. Skip 2 stitches from where you started chaining, and re-attach to the third st with a sl st to make the loop. You can also go back over the top of the chains with a row of single crochet if you want to add extra reinforcement.
Pattern: the detailed version
Part 1: Making the plastic yarn
Here’s everything you need to get started! Just some scissors, a 6mm (size J) crochet hook, and any can or bottle to use as a reference for sizing. And of course, some plastic bags.
From my experience, it takes around 4 grocery bags to make one coozie. It does depend a little bit on the type of bag you have though. Some stores have switched to a much thicker reusable plastic bag, which I’ve found is not as good for this method since it’s stiffer and harder to work with. Thin bags are generally easier, but you can make do with whatever you have available.
To start making plastic yarn, spread out the bag flat on a work surface. We’re going to trim off a few bits so that the resulting yarn is consistent and less prone to breakage.
First, remove the seam from the bottom of the bag. This will let us unfold it all the way.
Cut carefully along the edge of the seam, trying to keep all the folded layers stacked neatly so you don’t end up with a bunch of jagged edges.
Now flatten it out again and smooth out the layers that were held together by the seam. You should end up with something like this.
Next, cut off the handles at the top, plus any other inconsistent bits so you end up with one smooth line across.
The handles and seam that you removed aren’t going to be used in this project, but you can always reuse them in other ways. Extra plastic bits are great to use as filling for stuffing cat toys, since it makes a fun crinkly noise. Just make be careful to seal it well so no plastic bits can escape and get swallowed.
At this point you should be left with a big rectangular plastic tube that looks something like this.
Now we can start cutting plastic strips that will become the yarn.
At one of the ends, working on only a single layer (!!), cut at an angle to a depth of about an inch and a half (~4cm). Then start cutting a long strip, parallel to the edge of the bag.
If you are using one of those thicker plastic bags, make your strip narrower than this (more around 3/4″ or 2cm). It’ll result in a less stiff yarn that will be easier to work with.
From here, just keep cutting in a straight line, turning the bag as you go, in sort of a spiral pattern. Try to maintain roughly the same width the whole time.
Once your whole bag is cut into one unbroken strip, you can gently wind it into a ball. I usually just wrap it around my fingers, slightly twisting it as I go to make it more yarn-like.
Note: Don’t tug or pull too hard while doing this, since the plastic is pretty fragile and will stretch out and break if you use much force.
And here is the result. Repeat the process for the remaining bags.
I usually do 4 bags per coozie, 2 of each color.
Part 2: Crocheting the coozie
Note before we get started: I’m going to assume you are familiar with basic crochet techniques for this pattern. It’s definitely beginner-friendly though, so don’t worry. The only stitches/techniques you need to know are:
Making a magic ring
Chain and slip stitches
Half-double crochet stitch (or in UK terminology: half-treble crochet)
Working in the back loop only
If you can do all of that, you’re golden. Take a quick refresher if you need to, and let’s get started.
Row 1:
To start the coozie, make a magic ring. Chain 2 in the ring, then make 7 half-double crochet (hdc) stitches.
Very gently tug the end to tighten the loop (if you pull too hard you’ll stretch and break the yarn), then slip stitch to the initial chain stitches to close.
Row 2:
Chain 2 to start new row. Hdc once in the same stitch as the chains. Then do two hdc in each stitch the rest of the way around, and slip stitch to join. Counting the 2 chain as one stitch, you should have a total of 16.
Row 3:
Chain 2, then hdc in the same stitch (same as last row). In the next stitch, do one hdc. Then two hdc in the following stitch. Repeat the rest of the way around like this, alternating between one hdc and two hdc in each stitch. Again counting the 2 chain as one, you should have a total of 24 stitches at the end. Slip stitch to join.
Now we want to take a minute to check the size to make sure we got it right. Compare your crocheted circle to the bottom of a can or bottle and make sure it’s roughly the same diameter. A little larger or smaller is fine, since it’ll be flexible enough to accommodate some slight difference.
In case it’s significantly too small, you can add another row following the same pattern as the previous one, except add an additional hdc in between each double hdc (so, hdc twice in one stitch, then one hdc in next two stitches, and repeat).
Or if it’s too large, like if you’re making a coozie for one of those skinny cans, you can backtrack and remove a row.
Row 4:
Now we want to change direction and start adding height. To do this, we’ll do the next row working in only the back loops of the previous row.
Chain 2 like usual, then do one hdc in only the back loop of each stitch all the way around, and slip stitch to join. It should be the same total stitches as the previous row (24, unless you added an extra row, then it’ll be 32).
Rows 5+:
From here it’s really simple, we’re just going to work straightforward rows of normal hdc’s the whole way around, starting with 2 chain stitches, and ending with a slip stitch to join. Each one should be 24 total stitches (or equal to however many your last row was, if you added/removed rows earlier).
I like to change colors after about 3 or 4 rows, usually this is when I run out of my first color of yarn so it works out pretty well. You could also just do a solid color, or stripes, or whatever you want really. The color variation from the different patterning on the plastic is what makes these unique, so don’t stress about making it perfectly uniform.
The height of your coozie is up to you – I generally end up around 13-14 total rows, but it can vary depending on the thickness of the plastic you’re using, and how tight or loose you’re making your stitches. Just compare it to a can or bottle for reference until you’re happy with the height.
Adding a finger loop
I like to add a loop at the top of my coozies so they’re easy to carry. It’s also nice for clipping it on to a bag, or hanging it for storage.
To make the loop, don’t cut off your extra yarn yet after you finish your last row. Instead, make 6 more loose chain stitches. Then, skipping 2 stitches from where you started the chain, re-attach the end of the chain with a slip stitch to the previous row.
If you want to reinforce the loop to make it a bit more sturdy, you can turn and go back over each of the chain stitches with a single crochet to make it thicker.
And that’s all there is to it. Once you get the hang of working with the plastic yarn, you can whip these out really quickly, and your stash of plastic bags will be gone before you know it.
footnotes
1
aka “plarn”, if you like smashing words together
2
koozies? cozies? I can’t find a consensus on how to spell it
3
“oh this? yeah it’s nothing, just something I made”